PowerPoint 2013 Custom Shapes
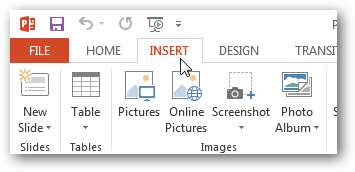
To get started, open PowerPoint 2013 and click the Insert tab on the Ribbon.
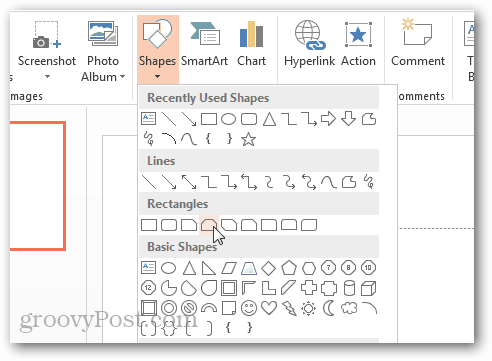
Next, click the Shapes button and choose a shape that’s most like the one you need to create.
Now open the Format tab and select the Edit Shape > Edit Points option.
Note: You can also access the Edit Points option from the right click menu when the mouse is over the shape.
Now to create your custom shape just click and drag the square black points into the position that transforms the shape into the custom dimensions you want.
If the shape doesn’t have enough points to make what you need, you can add more by holding Shift and clicking on the line at any position to create a new draggable point.
Points can likewise be removed by holding Ctrl and clicking them.
Once you have the exact shape you want, all that is left to do is color and add any text or effects you desire in the Format ribbon.
we are developing a powerpoint add in where you can both acces bot also save custom shapes. Since we are in the development phase, we do encourage people to give us feedback: http://www.powerpointinfographics.com/blogs/news/7602777-we-are-creating-a-new-service-what-do-you-think Thank you for your ideas and thoughts! Jeroen Breugelmans Comment Name * Email *
Δ Save my name and email and send me emails as new comments are made to this post.


![]()
