Unfortunately, this isn’t an option that’s enabled by default. You’ll need to enable Chrome tab groups using the hidden Chrome flags menu. Here’s how to enable and use tab groups in Chrome.
Enabling Chrome Tab Groups
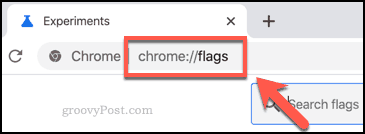
As of Chrome version 80, Chrome tab groups aren’t a feature available to all users by default. If you want to group tabs together in Chrome, you’ll need to enable it in the hidden Chrome flags menu. This is a secret menu where various experimental features and settings can be enabled. To access the Chrome flags menu, type chrome://flags in the Chrome address bar, then press enter.
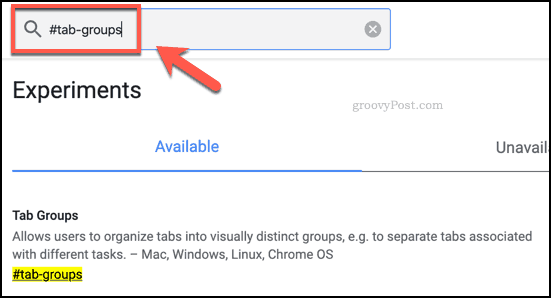
You’ll then need to search through and locate the Tab Groups flag. You can do this manually by scrolling through the list or by typing #tab-groups or tab groups in the search bar at the top.
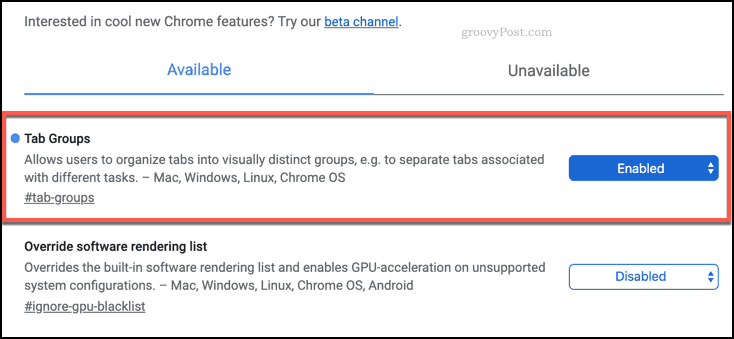
The Tab Groups setting flag is set to Default by default, which (as of version 80) means that the flag is disabled. To enable this setting, press the drop-down menu next to the flag and select the Enabled option.
You’ll need to restart Chrome after enabling this feature. Press the Relaunch button that appears at the bottom of your screen to do this, or close and reopen Chrome manually.
Once Chrome restarts, the Chrome tab groups feature will be enabled. You can double-check this by returning to the chrome://flags menu in your address bar. The enabled Tab Groups flag should appear at the top of the Available tab.
How to Group Tabs in Google Chrome
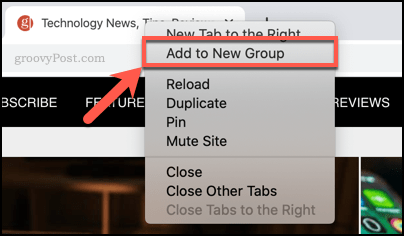
With the Tab Groups flag enabled and Chrome restarted, you’ll be able to group tabs together. To create a new tab group, right-click an open tab and press the Add to New Group option.
The tab will appear as part of a new group of tabs with a colored outline around it. You can follow the same process to create further tab groups.
Chrome will automatically set a default color for a tab group. You can change this by pressing the colored circular label icon next to your tab group. This will display a drop-down options menu for your tab group, where you can change the group color and add a group name label. The name you choose for your group will appear inside the tab label icon.
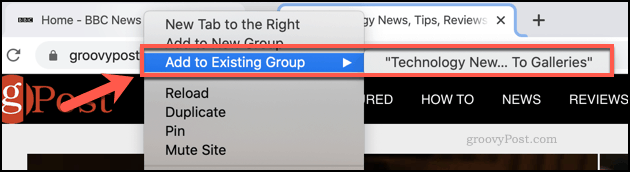
If you want to add more tabs to the new group you’ve created, right-click another tab and hover over Add to Existing Group, then select the option that matches your chosen tab group.
To remove a tab from your group, right-click the tab and press the Remove from Group option.
You can close all of the open tabs in a group at once by clicking the colored tab label (or circle, if the tab is unnamed) and pressing the Close Group option. Press Ungroup to remove all of the grouped tabs from the group and returning them to normal.
Tweaking Google Chrome Settings
While it isn’t enabled by default, Chrome tab groups prove how flexible the Chrome experience can be. You can tweak your Google Chrome settings even further by disabling tab hover cards to reduce screen clutter, for instance. If you’re looking for an entirely new (yet totally familiar) browser experience, you should get started with Microsoft Edge, the new Chrome-based Microsoft browser, instead.


![]()
