groovyVideo
They say a photo is worth a thousands words so a video must be worth a million right! Here’s a video which demonstrates the groovy high-tech look you can create if you follow the steps below!
Step 1 – Downloading Rocketdock
You will first need a dock. Technically, you can use any dock you want to do this, but we recommend using RocketDock. MrGroove wrote about it back in 2008 and guess what, its still free, simple to use and groovy! To grab your copy, simply go to the RocketDock website and check out the downloads section to find the latest version.
Step 2 – Fonts and the PSD File
You’ll be making your own icons, so for this you will need to download two archives – the Updated Text Icons by Bobbyperux from deviantart and also Geo Sand Light Font. From the first archive (deviantart), simply extract the PSD folder and from the second font archive, extract and install both of the fonts on your computer.
Step 3 – Making Your Own Icon
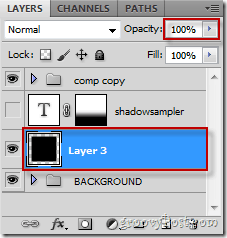
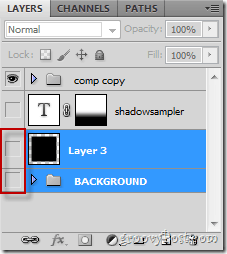
Here’s where we get to some Photoshoppin’. Remember the PSD file? Well it’s time to open it right now. Grab layer 3 and increase its opacity to 100%.
We’re going to be using this on a black colored background (well, at least I am) so we want to open the comp copy group and whilst having the type tool selected, click on each layer and select a white (or grey) color for it.
You see? Much better. At least now you can actually see what your text looks like in “the dark”. Now without letting go of the type tool, Click and type in your custom icon text inside of both the layers. PS – the text on both layers must be exactly the same, otherwise the reflection won’t work correctly!
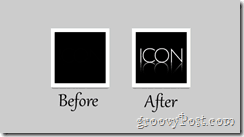
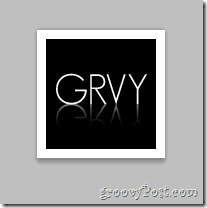
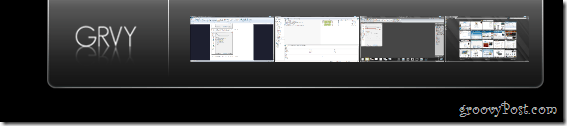
There. GRVY (or “groovy” in its shortened version). It’ll be perfect for our icon. Once you’re happy with the results, you’ll need to disable the BACKGROUND layer group and also layer 3 before you save.
The icon will now be ready for saving. Hit up Ctrl+Shift+S to save, then pick a location and make sure your format is set to .png to preserve transparency.
Step 4 – Applying Your Custom Icon
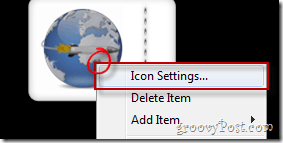
First drag the program or file into the dock with a simple drag and drop motion to get it in the dock. In my case, we have an internet shortcut file to our website.
Now right-click and pick icon settings to change the icon.
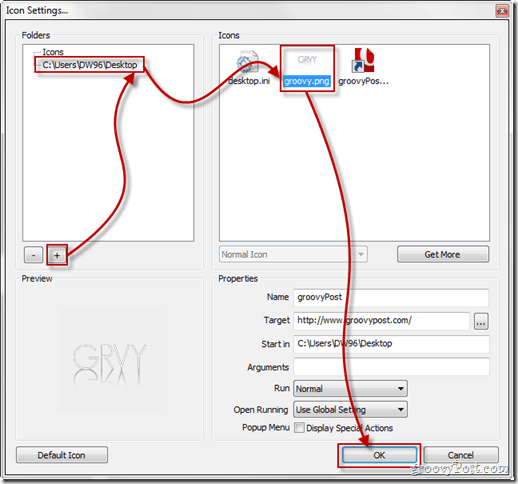
From the new window, use the + icon to navigate to the directory of the .png icon you saved and select it, followed by pressing OK.
Voila! You now have a shiny new icon!
Umm… really great, but ya know – you might also wanna see it a little better, right? Right, so right-click anywhere near an empty spot of the dock and select Dock Settings.
Now from all the categories, pick Style and select a dark theme (like CrystalXP.net for example).
Oh, yeah, and wanna know how we did the cool minimizing to the dock trick at the beginning of the video? Simply go to General and check minimize windows to the dock.
Cool. Now hit OK to save everything and give it a try. Both stylish and functional at the same time.
Done!
So what do you think of RocketDock? Are you going to be making docks a part of your PC life or not? Tell us in the comments below and watch out for more cool articles like this. Comment Name * Email *
Δ Save my name and email and send me emails as new comments are made to this post.
![]()


![]()
