That doesn’t mean that they’re perfect. You’re trusting Microsoft with a lot of data, and if you prefer your privacy, you may want to revert to using a local account. If you’re letting somebody else use your PC, switching to a local account is probably a safer option. Whatever the reason, here’s a look at how you can remove a Microsoft account from Windows 11.
How to Remove a Microsoft Account from Windows 11
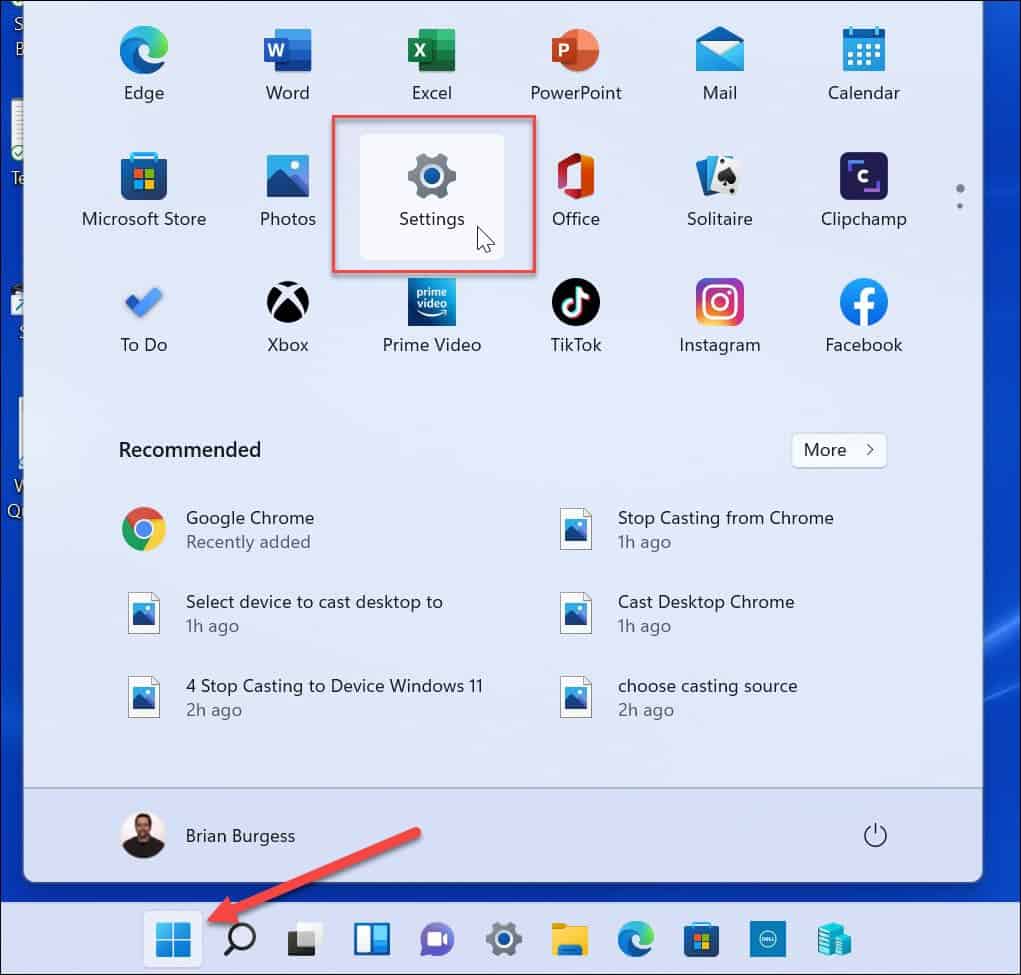
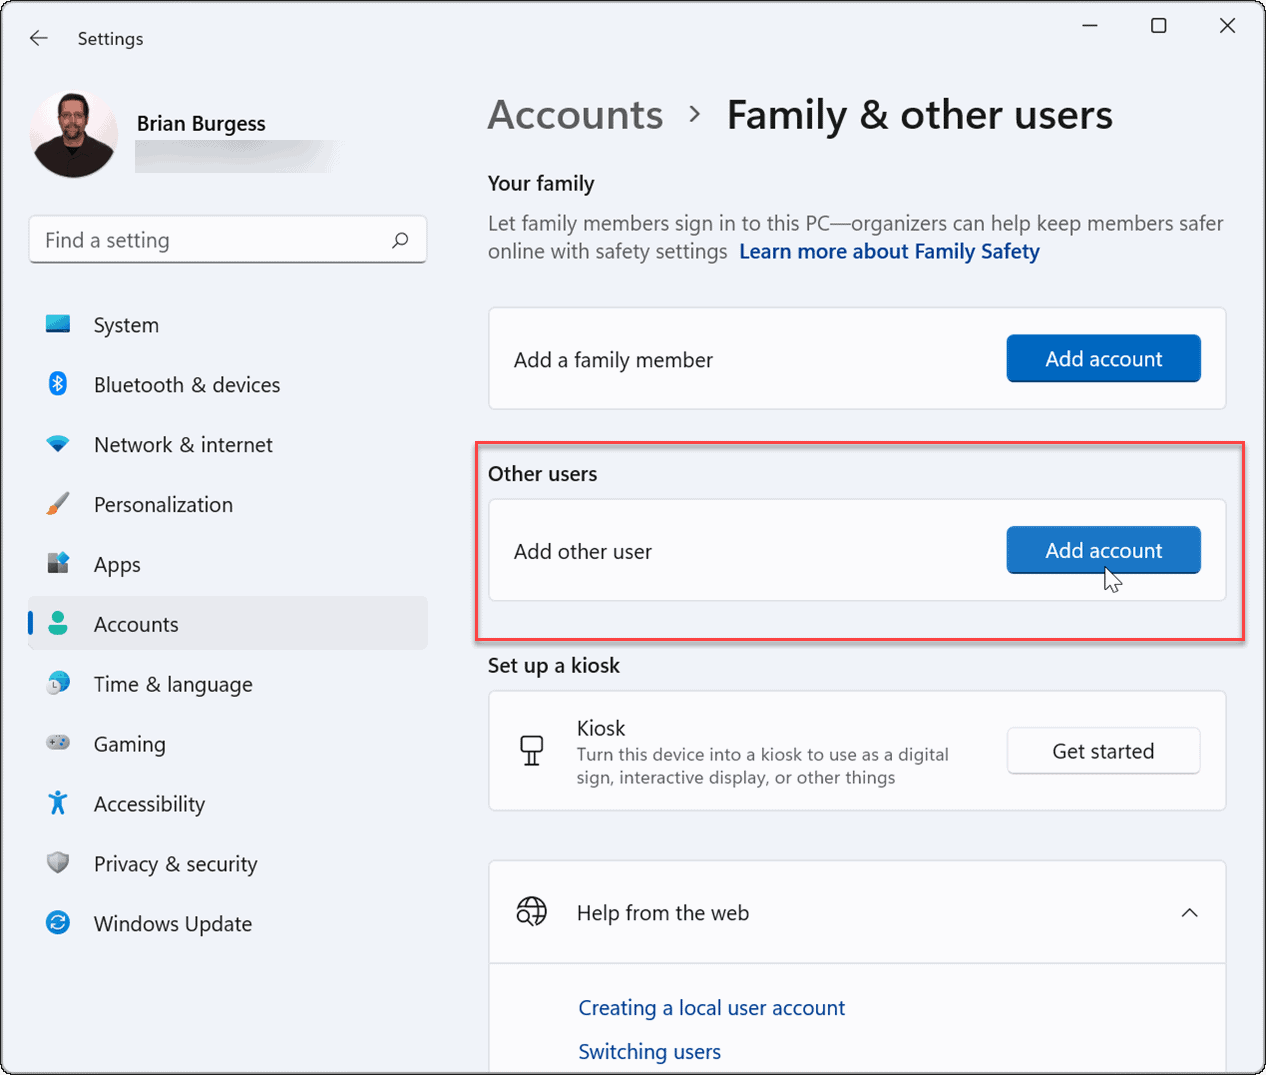
Microsoft accounts are tied to your PC. However, if you don’t need or want that arrangement with Microsoft, you can remove your account. Note: To remove a Microsoft account, you’ll need to create a local user account with admin privileges first. To remove your Microsoft account from Windows 11, use the following steps:
How to Set a Local User Account as an Administrator on Windows 11
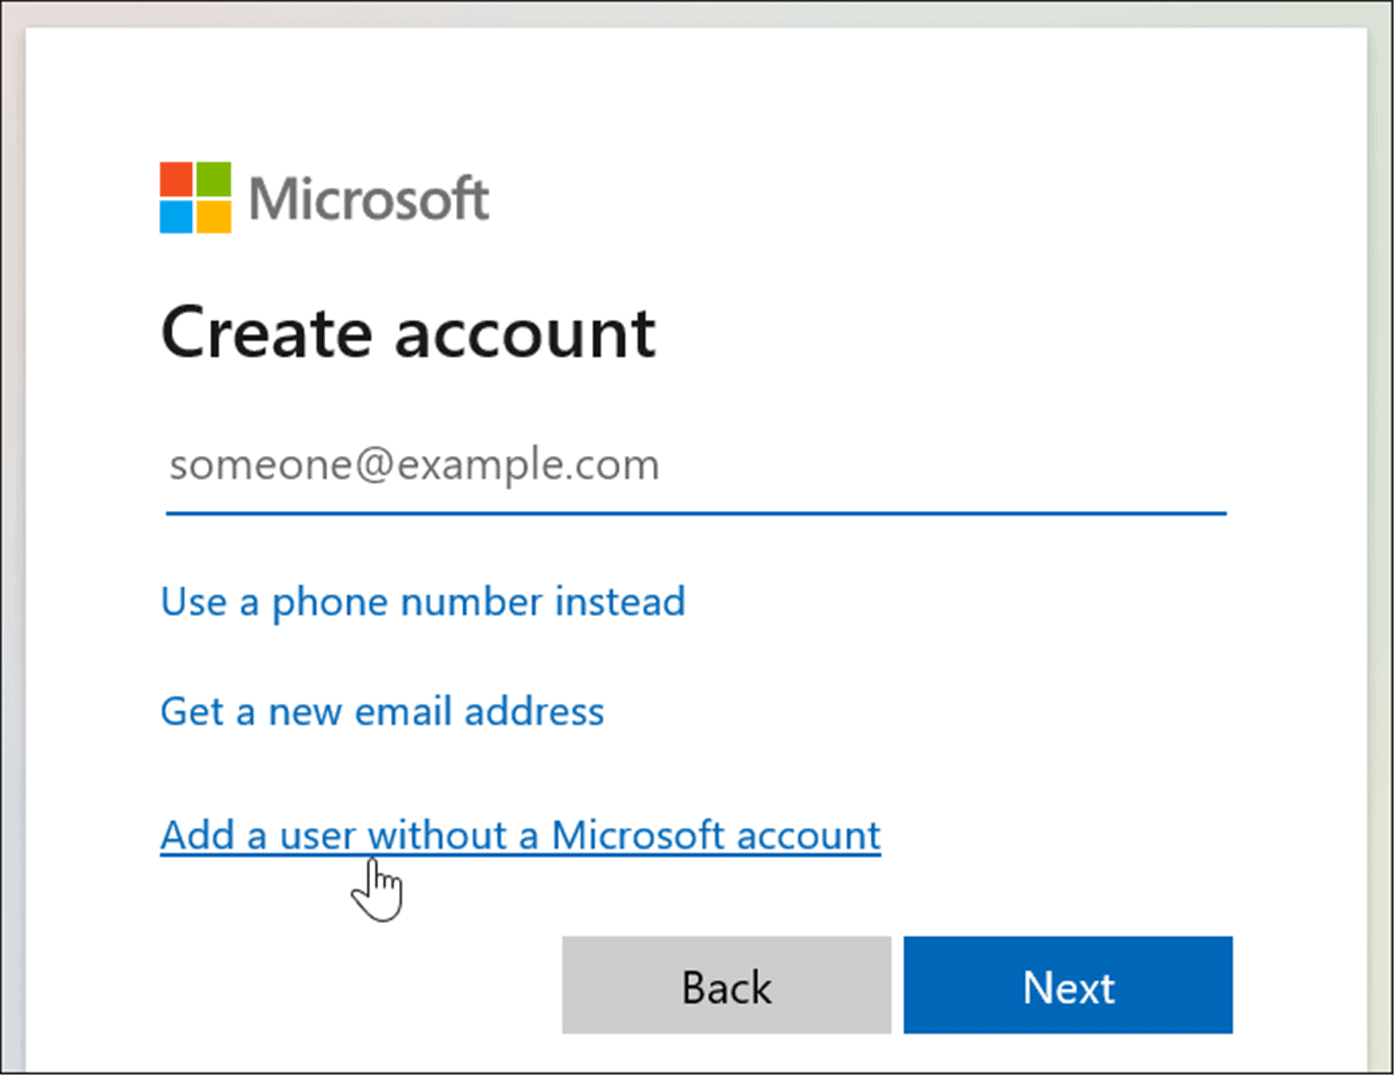
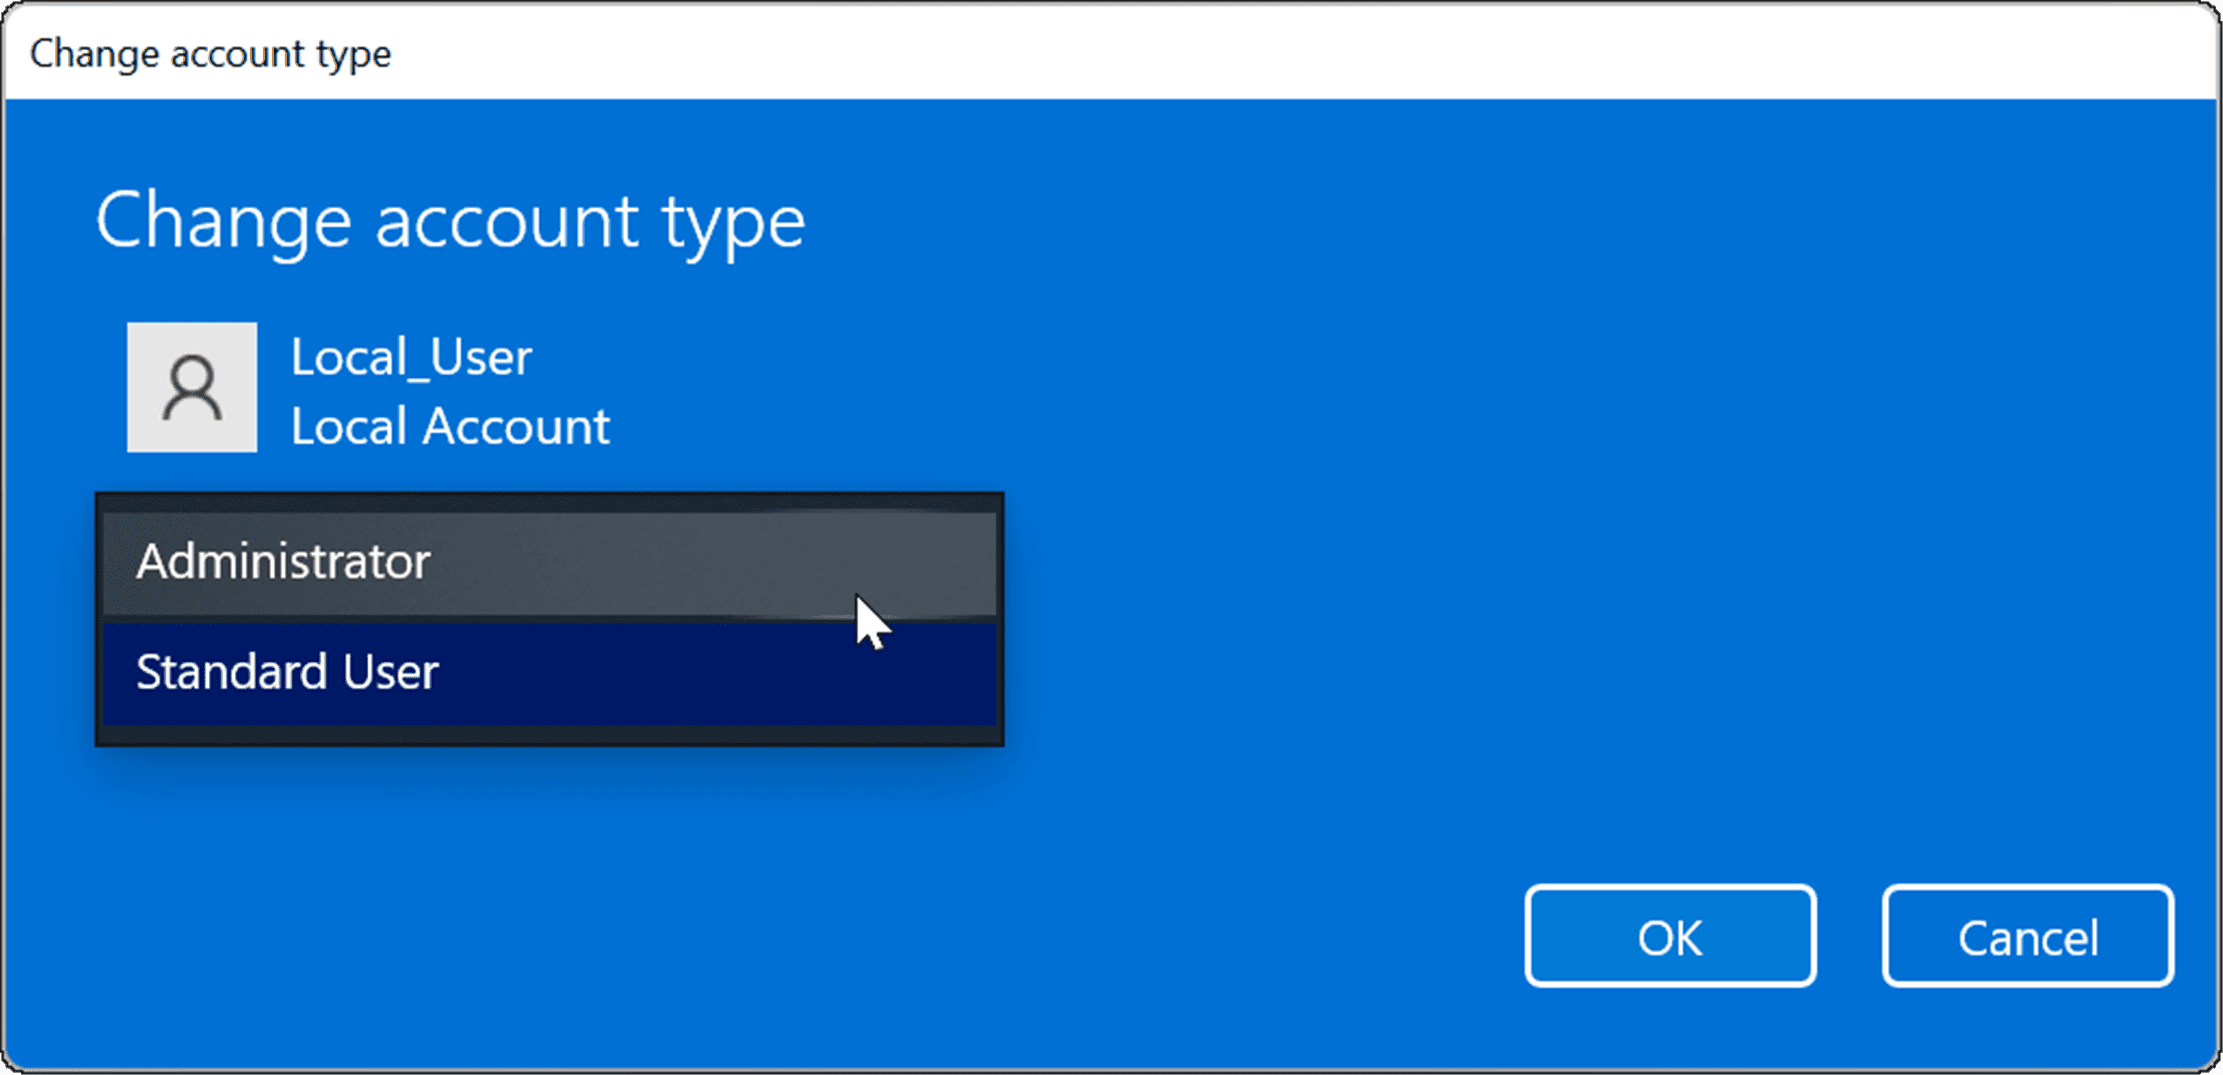
Creating a local account is a necessary step in removing a Microsoft account from Windows 11. You’ll also need to give the new local user account admin privileges to ensure you have full, unrestricted access to your PC using it. To set a local user account as an administrator on Windows 11, use the following steps:
How to Delete a Microsoft Account on Windows 11
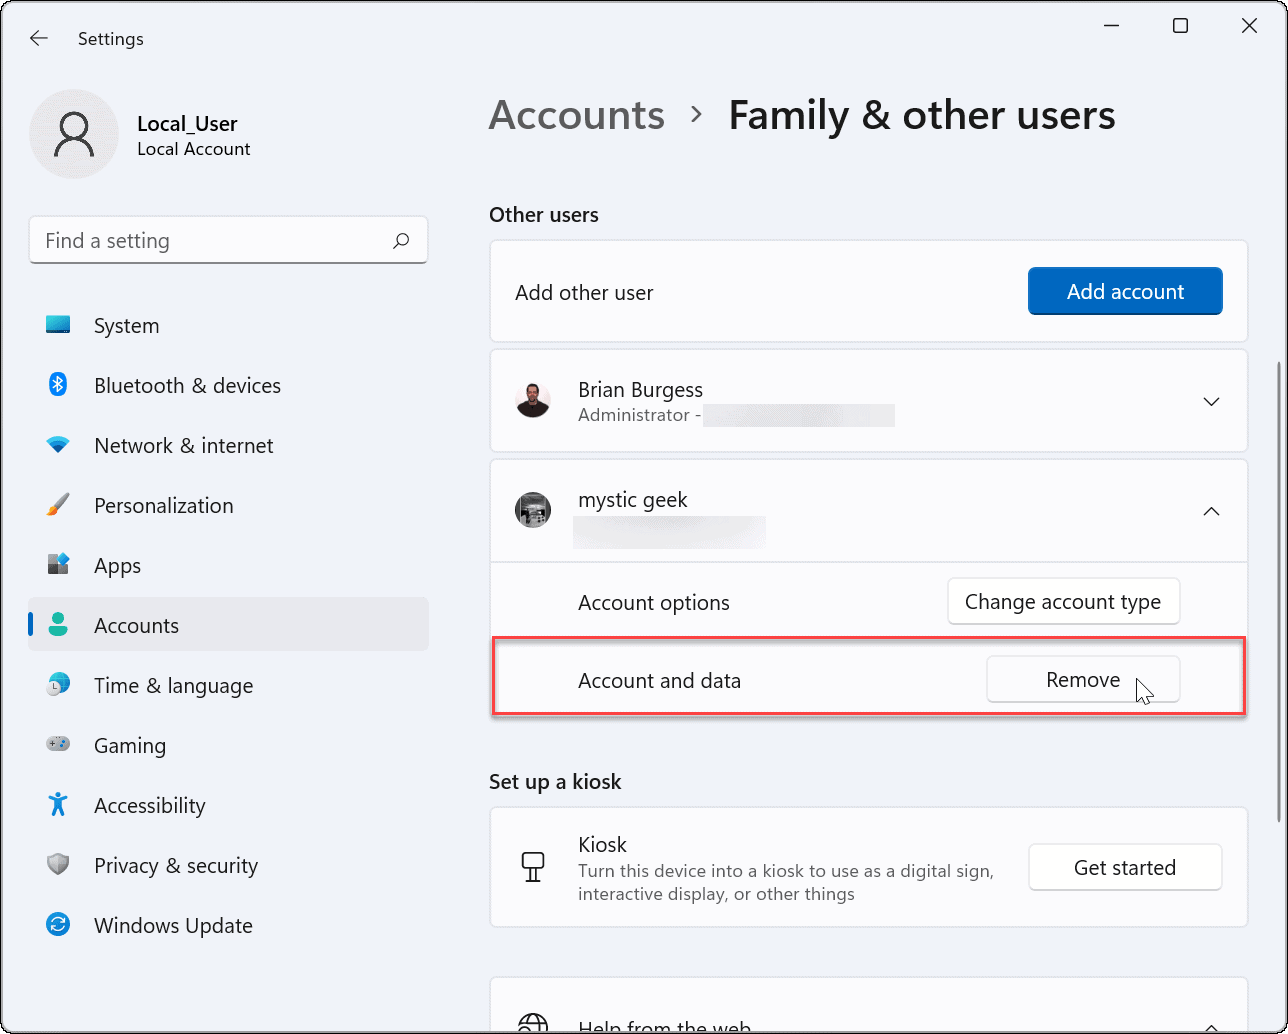
Now that you have a local account set up with administrator access, you can remove the Microsoft account(s). This will remove the account from your PC, but you’ll still be able to sign in to it elsewhere. To delete the Microsoft account from your Windows 11 machine, follow these steps:
By confirming the deletion, the Microsoft account and its data are removed, and it will no longer appear on the sign-in screen. If you need it back for any reason, you can always add a new user on Windows 11.
How to Delete a Microsoft Account Using Control Panel
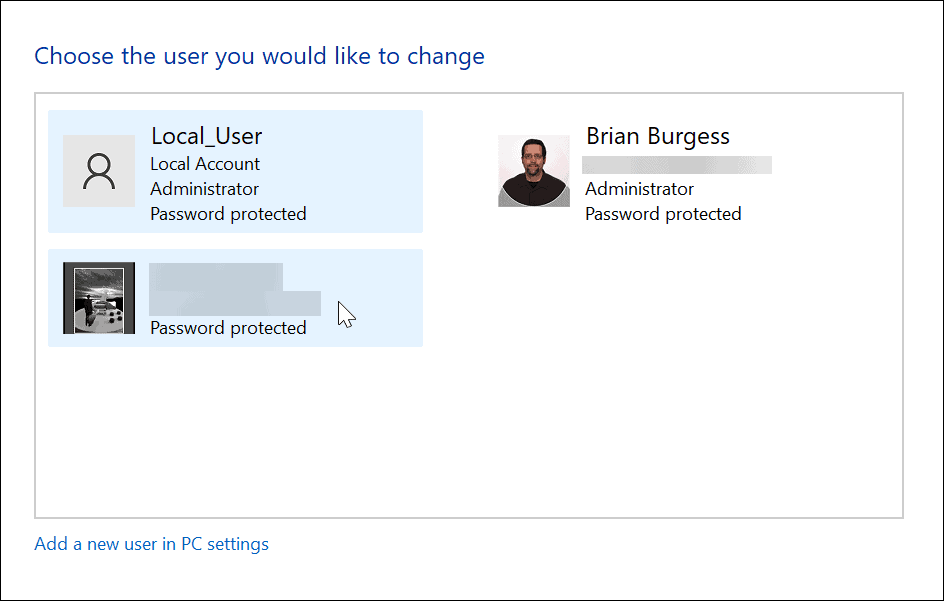
You can still remove a Microsoft account via Control Panel on Windows 11 (for as long as the Control Panel remains available). However, using this method still requires you to be logged in as a local user with administrator access. To remove a Microsoft account through the Control Panel, use these steps:
That will delete and remove the Microsoft account from your PC, and it will no longer appear on the sign-in screen.
Preparing Windows 11 User Accounts
The steps above will help you to remove a Microsoft account from a Windows 11 PC. If you have a busy household or it’s just the two of you, adding another user account on Windows 11 can be helpful. Each user will have their own profile to customize their Windows experience without affecting other profiles. It’s also worth mentioning that you can change your account name on Windows 11. In addition to changing the account name, you can also change your account picture on Windows 11. If you’re tired of clicking Yes all the time when making a system change, you can also disable User Account Control prompts on Windows 11. Comment Name * Email *
Δ Save my name and email and send me emails as new comments are made to this post.


![]()
