Firefox Sync is pretty straight-forward. It allows you to easily sync your bookmarks, passwords, preferences, history, and tabs between multiple devices. Ready to set it up? Let’s get started! Article Map This is a rather long how-to and it is easy to lose your place while reading it. To help prevent that, we’ve included a jump list to help navigate it. Click a link below to automatically jump to that section of this page.
Creating a Firefox Sync Account (on a computer)Adding extra computers to your Firefox Sync AccountSync your Android device to your Firefox Sync AccountDirections to un-sync Firefox 4 on your computer.
Setting up your Firefox Sync Account
Step 1
In Firefox 4, Click the Firefox menu button at the top-left of the browser. From the menu Select Options.* *If the Firefox button does not appear in your browser, Press the Alt+T key-combination to open the tools menu, then Select Options.
Step 2
In the options menu, Click the Sync tab and then Click Set Up Firefox Sync.
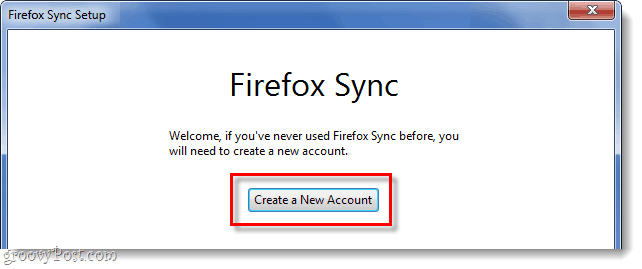
On the next screen Click the top button that says Create a New Account.
Step 3
Now you’ll need to fill in a couple different things to create your account. Enter your email address, and then also enter your password for the sync setup. Once you’ve filled in the details, Click the Sync Options button. Tip: Keep your password something easy to remember. A hacker will need either access to your device or your Sync Key in order to get into your sync account, so a strong password is not necessarily required (but still recommended).
Step 4
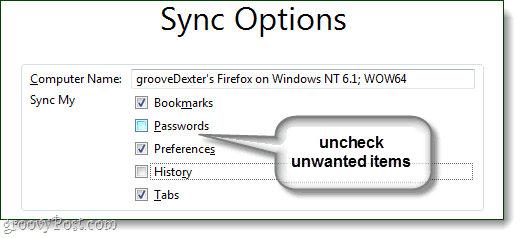
From the Sync Options window that appears, Uncheck any items that you don’t want to be synced. For me I don’t want my online passwords being stored on my phone or other computers, and I don’t need my history synced between devices either. When done, go back and Click Next on the previous window.
Step 5
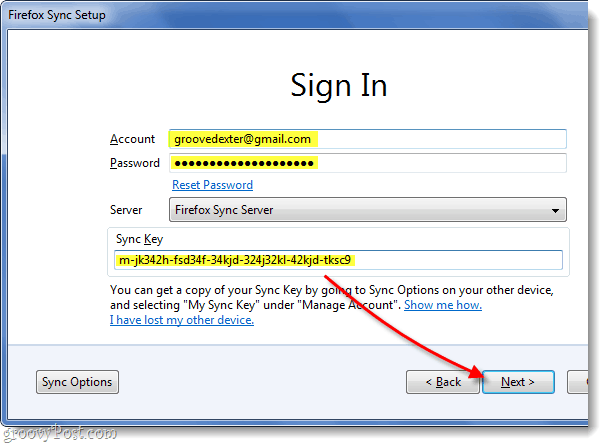
Firefox will now give you your newly generated sync key. It is very important that you do not lose this number! Write it down, print it out, screenshot it and save, do whatever it takes to remember it. Personally, I just copy mine to a text file and dump it in my Dropbox or email so I can access it anywhere. If you lose this number and lose access to a synced device, you will not be able to get into your sync account ever again; you also won’t be able to register the same email address to make a new account. Mozilla (Firefox) does not keep this number on their server, so nobody will be able to recover it for you. Once you’ve got it backed up, Click Next.
Step 6
Solve the captcha puzzle and Click Next.
Done!
Your Firefox sync account is set up and your Firefox 4 client is now synced to the server. After you Click Finish you’ll be brought to the following page automatically: http://www.mozilla.com/en-US/firefox/sync/firstrun.html Now you can start adding other devices to your Firefox 4 sync account, and we’ll continue walking through that below.
Connecting Another Computer
Step 1
In Firefox on your additional computer, open up the Options menu.
Step 2
Click the Sync tab in the options menu, then Click Set up Firefox Sync.
Step 3
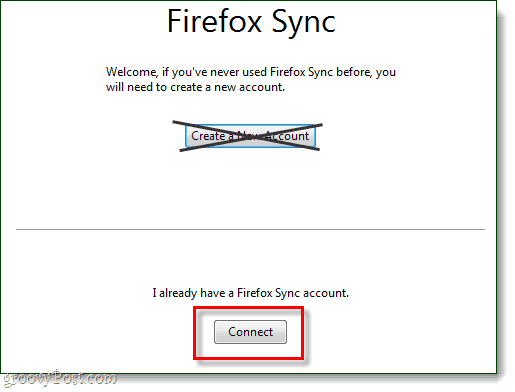
Next Click the bottom button on the Firefox Sync page, titled Connect.
Step 4
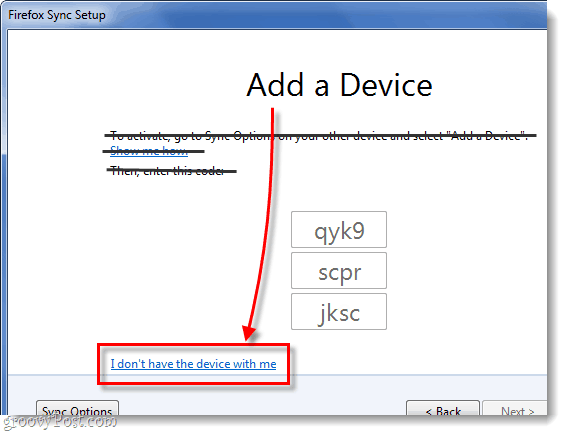
On the Add a Device page, Click the link on the bottom that says “I don’t have the device with me.”
Step 5
Type in your Firefox 4 sync account email address and password. Then Type in our Sync Key. Click Next when finished.
Done!
Your Firefox 4 account is now synced on an additional computer. You can repeat this process as many times as you like. I have all of my computers running on one Firefox Sync account, and it keeps things groovy. Being able to easily jump between computers without losing my open browsing tabs is a really useful feature to have. All that is left now is to add Firefox sync to your phone, below we’ll talk about the process for Android.
Syncing An Android Phone
Step 1
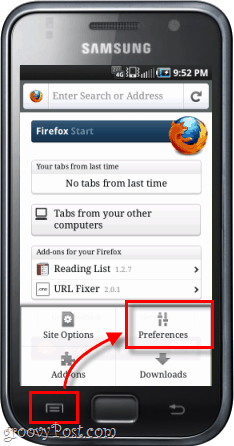
First, you’ll need the Firefox Android app.* Once the app is installed, Open the Firefox app. On the outside of your phone Press the menu button and then Tap Preferences on your phone’s screen. *If you are using Dolphin or some other browser, there are plugins that will do the same thing but to keep tings simple we won’t be talking about those today.
Step 2
On the main preferences tab, Click the Connect button.
Step 3
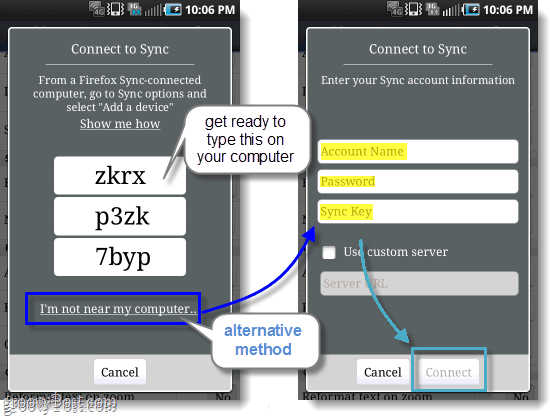
Now we have two different options. Option 1: If you have a computer nearby that already has Firefox synced it is the easiest. The three rows of numbers and letters will need to be typed into a synced computer’s Firefox 4 client, and we’ll go over that below. Option 2: Alternatively if there is no synced computer nearby, you can just Tap I’m not near my computer and then enter in your Account Name (which is actually your email address), Password, and Sync key.
Step 4
Assuming you went with Option 1, now you need to get on your synced computer’s Firefox 4 browser. Open up the Options window and then on the Synced tab Click Add a Device.
Step 5
Type in the 3 rows of letters and numbers just as they appear on your Android phone, then Click Next.
Done!
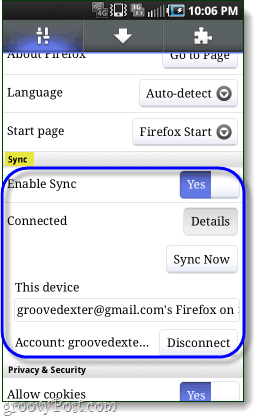
Your phone should automatically refresh itself, and it is now synced. On the preferences page you can now see the account your are synced to, and disconnect (un-sync) option is also available. Now your tabs and other browser items should be linked to the ones on your computer, and vice versa.
How to Unsync Firefox 4 On Your Computer
If you want to get rid of Firefox sync, you’ve come to the right spot on this page. Note that removing Firefox sync will also clear out your preferences and account information on your Firefox 4 client.
Step 1
Open up the Firefox 4 Options window, and then on the Sync tab Click the Deactive this Device link.
Step 2
Click the Reset All Information link to confirm that you want to un-sync.
Completely Done!
Now you know the ins and outs of setting up and getting rid of sync in Firefox 4 for your computer and Android. We really like sync and are happy to have written this guide, so if you found it useful or informative please drop a comment below and let us know what you think! Comment Name * Email *
Δ Save my name and email and send me emails as new comments are made to this post.


