When friends ask me about How-To start a blog, my standard answer is 1: WordPress and 2: Windows Live Writer. I explain that Windows Live Writer is like Microsoft Word for blogging. I was thinking about those conversation when I discovered back in Word 2007 that you could actually blog using Word. Although in 2007, the features weren’t very good so I never talked about them however, with the release of Microsoft Office 2010 and Word 2010 the blogging features built into Word are actually pretty good. Let’s take a look shall we!
Step 1.a – Start A New Blog Post
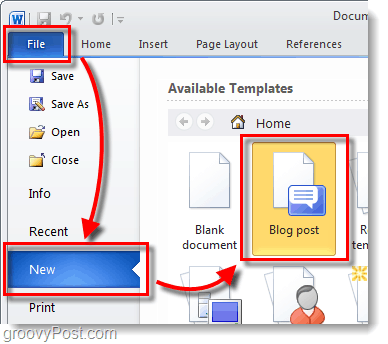
Open Word 2010. Click the File ribbon and then Select New > Blog post.
Step 1.b – Convert A Word Document To A Blog Post
Alternatively you can convert any Word document into Blog format by choosing: The document won’t be published immediately, but instead will transfer to a Blog wordpad where you can preview and make changes.
Step 2 – Write
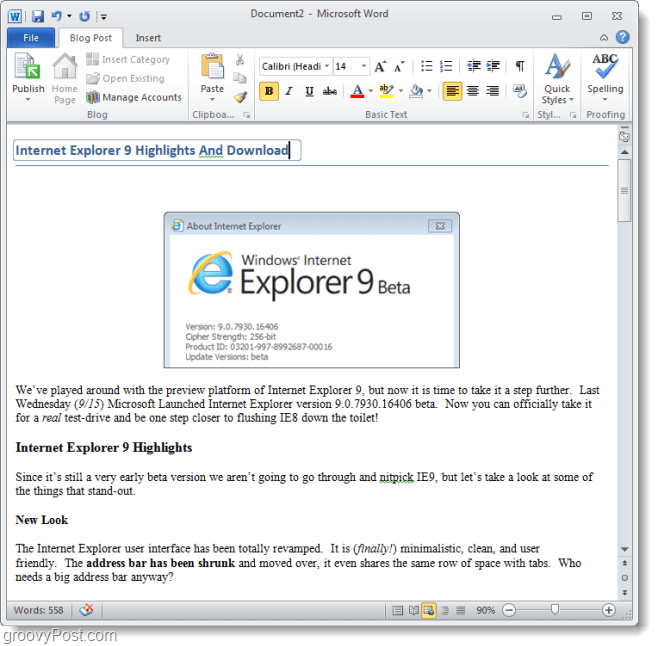
Write your blog post. Word 2010 has a huge variety of tools for writing web posts, this allows you to really take command of your content. Be sure to save often or enable Office 2010’s AutoRecover features so that you won’t lose work in case of an accidental computer crash.
Step 3 – Connect Word To Your Blog
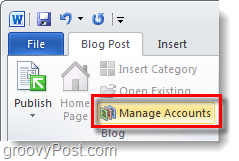
Under the Blog Post ribbon, Click Manage Accounts.
Step 4
In the Blog Accounts dialog that appears, Click New. Another pop-up should appear. Select your blog provider* from the drop-down list and then Click Next. *WordPress refers to websites running the WordPress blogging software, but it will also work for blogs hosted on wordpress.com
Step 5
In the next windo,w you’ll be required to Enter your Blog Account’s User Name and Password. This screen will vary depending on which service your blog is hosted by. If you want to avoid A LOT of annoying password screens be sure to Check the Remember Password box. Considering how popular WordPress is, below is an example of how to set it up with WordPress. If for some reason you have trouble connecting, you may need to locate the URL of your xmlrpc.php file. If WordPress was installed on the root of your site, just enter your domain name in the indicated area. Be sure to leave xmlrpc.php at the end of the path! Example: http://www.mywebsite.com/wordpress/xmlrpc.php
Step 6
Was your site/blog added successfully? If so it should display on the list of Blog Accounts. You can add as many as you like to this list and choose which one you would like to be your default.
Step 7 – Publish or Upload
In the Blog Post ribbon, you will find the Publish button. If you Click the down arrow below it you’ll be given two options:
Publish – You can post your blog article directly onto your site for all of your readers to see.Publish as Draft – This will only upload the article to your blog’s online queue with Draft status. It can be posted later from your online blog interface and it can also be downloaded back down to word if you don’t save your Blog document.
Step 8 – Manage And Edit Existing Blog Posts
On the Blog Post ribbon ,you can Click Open Existing to download a list of posts that are currently uploaded and existing on your online Blog archive. You can then choose an individual article and download it to edit or publish an existing uploaded draft.
Step 9 – Edit Articles
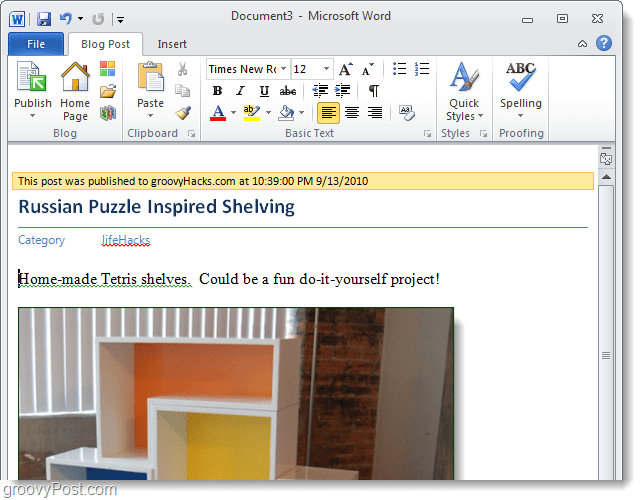
Editing existing Blog posts is just like writing new ones. The only difference is that there will be a yellow bar above the post stating when it was published. There will also be a category bar if you assigned a category to it.
Conclusion
Microsoft Word 2010 is a groovy tool for writing and editing Blog Posts across several different blogging platforms. It has a great spell-checker and a variety of useful formatting tools and effects to really add some depth to your articles. Despite all of the features Word has however, the Windows Live Writer team still outshines Word when it comes to blogging not to mention the Windows Live Writer is FREE and Word is not. Like my father always said, use the right tool for the job. Don’t use a saw to drive a nail in a board. So if you want to blog, use Life Writer. If your in a pinch however and need to update a blog post or get something out quickly, use Word 2010. Personally, I used word 2007 to update my blog at work and it does just fine. I’ve personally not been able to get my hands on the beta but I would think…. they would include a similar blogging tool with the new MAC Word 2011 similar to Word 2010 for Windows but honestly, who knows. If I find out i’ll let you know. My experience is that it is better to type the text in MS Word but the final editing should be done in WP itself. Sure, WP has a tool that can transform doc file into html, but I would prefer to do it by myself. There is nothing in the options to make the change easily however there might be a registry hack somewhere. I’ll try to track it down. If you find it before me, drop the find here or in our forum. Thanks for the great question. •The number of the most recently used documents on the File tab, for example: To customize the number of the most recently used documents in the Recent menu on the File tab, do the following:
- On the File tab, click the Options button:
- In the Word Options dialog box, on the Advanced tab, scroll down to the Display section:
- In the Show this number of Recent Documents box, set the number of documents you want to have on the File -> Recent menu. You can choose any number between 0 and 50 (inclusive).
- Click the OK button. When you increase the number in the Show this number of Recent Documents dropdown list, Word doesn’t add the extra files immediately to the list, but rather adds them one by one as you open and close files. If you reduce the number to 0, someone can’t increase that number and immediately see which files you’ve been working with (but they still may be able to find that information elsewhere in the Windows operating system). To customize the number of the most recently used documents on the File tab, do the following:
- On the File tab, click the Recent button.
- Select the check box to Quickly access this number of Recent Documents and choose how many files you want to see: Links to those files will appear above Info. Note: Clearing the check box removes the list. To make Word keep a particular document on the File tab, open the File -> Recent menu, and then click the pin next to the file’s name. Word pushes in the pin to indicate that the document is “pinned” in place, and then keeps the file in that place on the list until you unpin it by clicking the pin again: You can change it from 0 to 50. Shame if you need to use a reg hack to acheive this. BTW: WLW does pages as well as articles. Is it just me or is pages missing fra Word 2010 as well? Regards. Rajitha Joe In need of webhosting? Try Speedy-Joe’s. Register a domain and purchase web hosting please! Thank you. http://www.Speedy-Joes.com In the past it was pretty difficult to “man-in-the-middle” hack someone mainly due to access however with the widespread usage of WIFI these days, it’s fairly simple to harvest credentials not sitting in a Starbucks. So point well taken. You’ve made me think again (dangerous…) on protecting against this kind of threat… Comment Name * Email *
Δ Save my name and email and send me emails as new comments are made to this post.


![]()
