Creating Photoshop Photo-in-Photo Effect
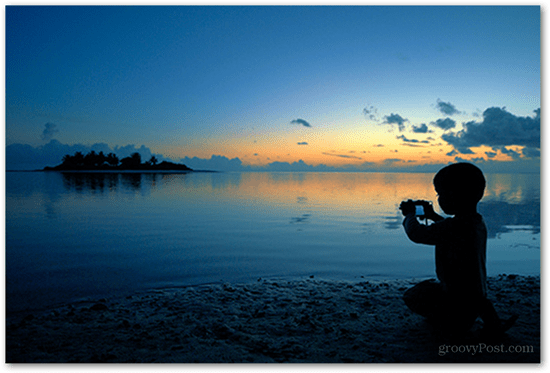
The example image I will be using in this tutorial is courtesy of muha on flickr. You can download it by clicking the image below:
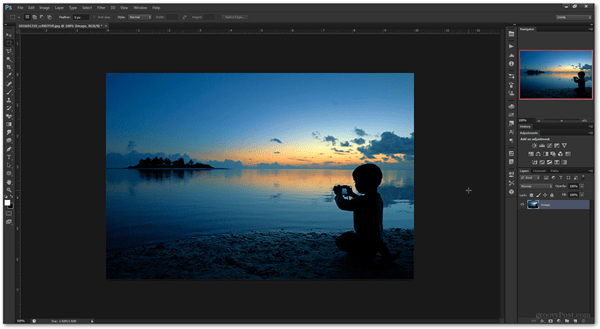
Step 1
Begin by opening the image in Photoshop. A quick Ctrl+O can help you with that, or of course, you can just drag the file into Photoshop to begin editing.
Step 2
Pick up the Marquee Tool from the tools menu or by pressing “M” on your keyboard.
Drag out a quick selection of the area where you’d like the Photo-in-Photo effect to be.
A quick tip for this part – you can right click your selection and choose “Transform Selection” if you want to get more creative and create the effect at a slight angle. Another good use for transforming your selection is to precisely nudge it exactly where you want it to.
Step 3
After applying your transformation, press the Enter key on your keyboard. Then right click inside of your selection and chose “Layer Via Copy”.
This will copy the selected area onto a new layer where it’s safe for editing and won’t alter the original image.
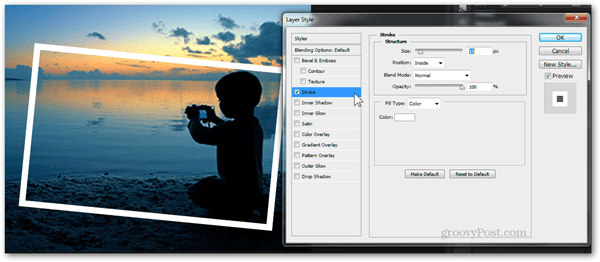
Step 4
Now we can begin applying the actual effect. Right click on the newly created layer and pick “Blending Options”.
Begin by adding the “Stroke” effect. Below are the settings that I use, but do keep in mind this is just my taste. You can get creative and fiddle around with the settings yourself.
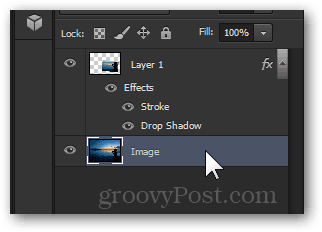
Size: From 10 to 150 depending on the image size Position: Inside Blend Mode: Normal Opacity: 100% Fill Type: Color Color: White (#ffffff) You can also add some other additional effects to further emphasize on the subject. My favorite ones are Drop Shadow and Inner Shadow. Starting with Drop Shadow, here are the settings that I normally use:
Blend Mode: Normal Color: Black (#000000) Opacity: From 40 to 80 depending on your taste Angle: Any Distance: 0 Spread: 0 Size: From 30 to 150 depending on image size and on your taste And here is a quick example of Inner Shadow:
Blend Mode: Normal Color: Black (#000000) Angle: Any Distance: From 5 to 30 depending on your taste Choke: 0 Size: From 10 to 120 depending on image size and on your taste Once you’re happy with the applied effects, press OK to apply them to the layer and to exit out of the Layer Style options.
Step 4
Since we’re already done with applying the photo frame effect to our top layer, we can move on to the actual image itself. Begin by left clicking the lower layer to make sure it’s selected (tip: if the layer name is background in italic letters, double click it and then press OK to convert it to an unlocked layer).
One of my all-time-favorite effects for emphasis is the classical and sharp contrast between black and white and color. You can try this yourself by adding a B&W adjustment layer…
…and tweaking some of the settings until things look just right:
Step 5 (Optional)
You can save your image directly after completing step four, but if you feel that your image needs a little something more, feel free to continue experimenting. Here’s what I was able to achieve with a little motion blur, blending, noise and contrast:
Step-by-Step Tutorial Video
Here’s my video tutorial showing the process in action, step-by-step:
Comment Name * Email *
Δ Save my name and email and send me emails as new comments are made to this post.


![]()
