Smart Objects in Photoshop can make work easier when preparing documents for your company. Ever had to print out different versions of a single image multiple times on a single page? Just thinking about it I think I might faint from all the copying and pasting I’ll have to be doing every time. But isn’t there a simpler way? In fact, there is. This time we’ll give you a quick tip on saving some time when making your print layouts with the help of Photoshop Smart Objects.
Create The Photoshop Image to Print
The Image that I will be using with the Smart Objects feature is this one:
For my first image the layers panel looks like this– yours will obviously be different, but I’m showing this just as an example of what we will be merging together later on.
Merging Your First Image Into A Smart Object
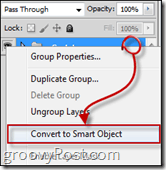
Create a new group with the icon. Name it whatever you want (for mine I used “Contents”) and move all of your layers into that group. Then select your Group, right-click and select Convert To Smart Object.
Laying Out Your Image For Printing
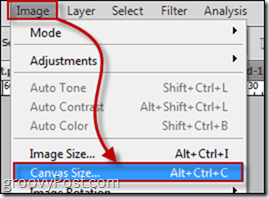
Now increase the Canvas Size by going into Image > Canvas Size on the Photoshop menu.
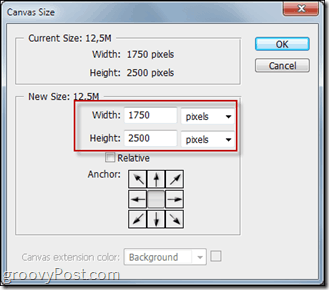
Pick the size in centimeters or pixels. For my example here I used 1750×2500.
Then duplicate the Smart Object you created as many times as you want and align all the Smart Objects so that they are all equally apart from each other.
Use Smart Objects for Multiple Versions
You can print and/or save multiple versions of the same business card printing layout by simply editing the smart object. To do so, just right click the main Contents and pick Edit Contents.
Afterwards you’ll be able to edit your business card or just replace it with the second version you’ve already prepared. Once you save your smart objects and exit out into your initial print layout you will see that all the duplicates will be now replaced with your second version.
Comment Name * Email *
Δ Save my name and email and send me emails as new comments are made to this post.
![]()


