Unfortunately, remembering to track all of these things isn’t easy. And forgetting means you’ll miss tracking workouts and monitoring your progress. To make this process a little easier, let’s look at how you can automate this process using MapMyFitness, Zapier, and Google Sheets.
Set Up Your Accounts
Before you can set up this system, you’ll need to create a new account with MapMyFitness, Zapier, and Google Sheets. Visit the MapMyFitness website and select Sign Up. You can either sign up using your Facebook account or enter your details to create a new account. The MapMyFitness dashboard is very simple and straightforward. It’ll show you a summary of all of your activities over the past month.
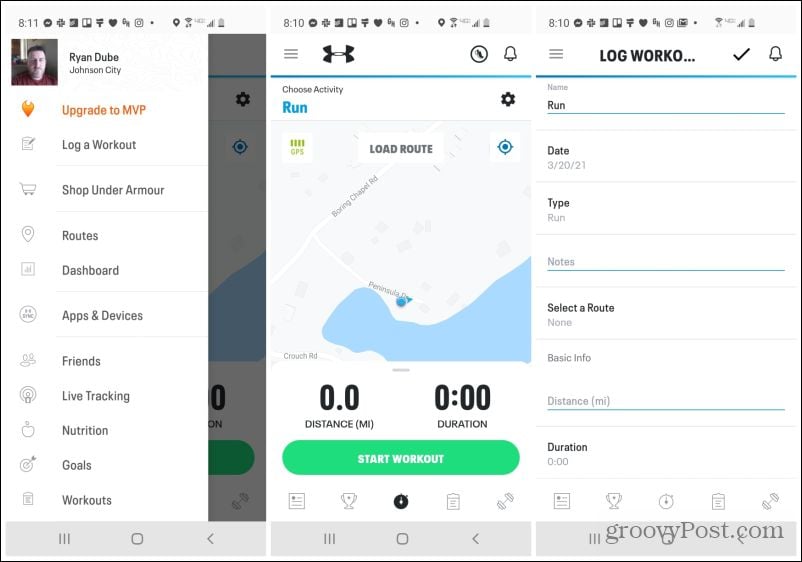
You can use either the website or the app to add a workout. Entries for workouts are quick and simple and include a long list of activities to choose from.
The app has an even better interface for logging workouts, including a map that tracks the progress of your hike or runs.
All your workouts and other information is logged and stored in your cloud account with Under Armor. It’s that data that you can use later with Zapier to automate your activity logging. Next, head over to Zapier and set up an account there. You can get a free account that allows up to 2,000 tasks a month which is more than enough for this automation. Or you can pay just under $20 a month for the Starter account that allows up to 3,000 tasks a month. Finally, so long as you have a Google account, you’ll have access to Google Sheets.
Create the Basic Task on Zapier
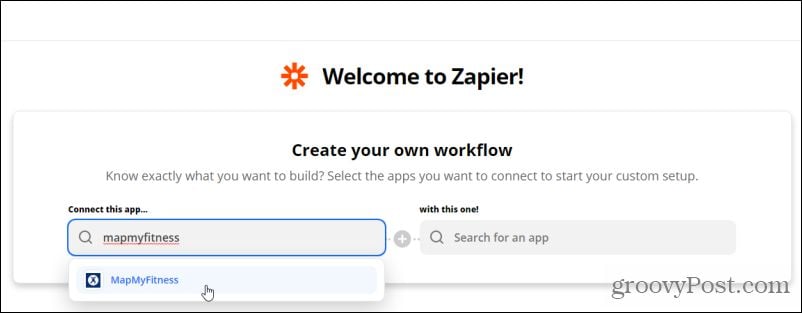
The next step is to make sure Zapier can connect to both MapMyFitness and Google Sheets. On the main page, type mapmyfitness in the first Connect this app field. Select MapMyFitness when it pops up.
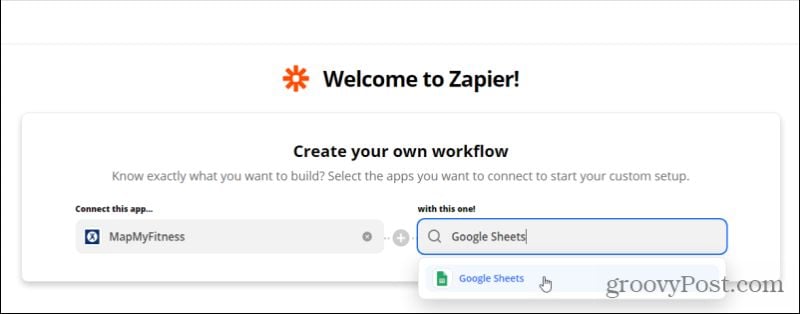
Type Google Sheets in the field on the right and select Google Sheets when it pops up.
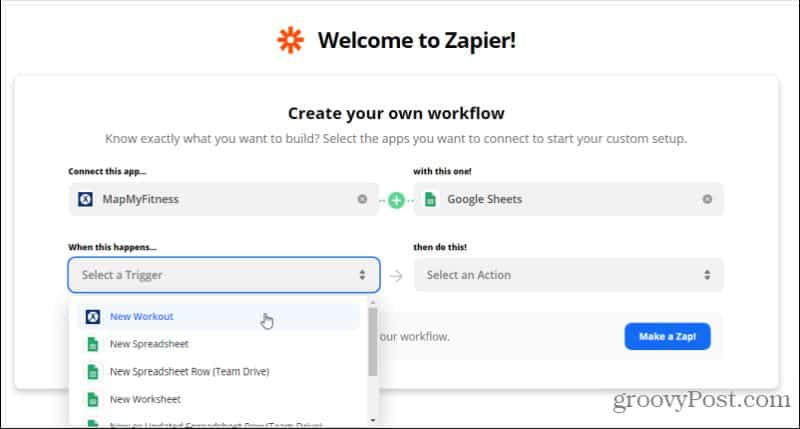
A new row will open where you’ll need to select the trigger and action for your Zap. Under When this happens, select New Workout in the trigger field so that the Zap will trigger any time you log a new workout on MapMyFitness.
Under then do this!, select Find or Create Row.
Now you’re ready to move on to the next phase of creating the Zap where you can define details like your connected accounts and data details.
Set Up the MapMyFitness Trigger
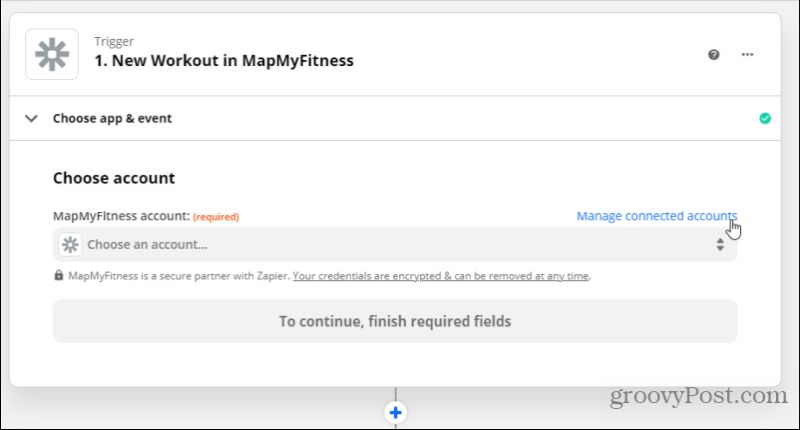
A new screen will open that steps you through building the details for your Zap. Step one will be connecting to your MapMyFitness account and choosing the trigger. Under Choose app & event, select the Manage connected accounts link under Choose Account.
Under Add new connection, search for MapMyFitness, and then select Connect.
This will open the Under Armour authorization page. If you’re not already logged in, log into your Under Armor (MapMyFitness) account, and then select the Authorize button.
Once authorized, you’ll see the account listed in the dropdown under My connections. Select Back to return to the Zap setup page.
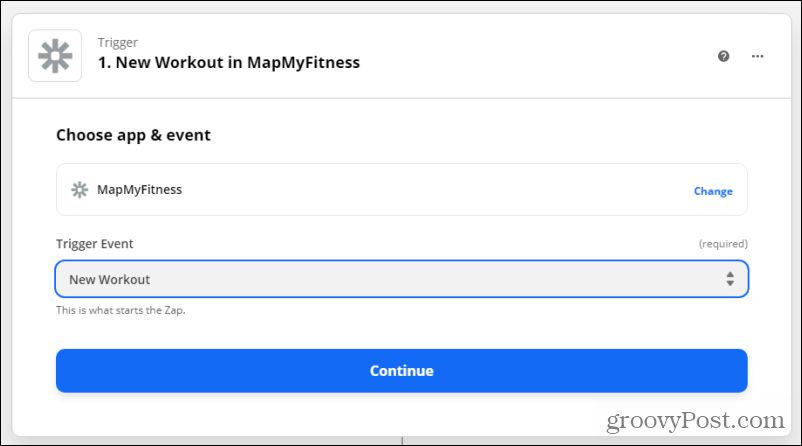
Select the Trigger Event field and select New Workout. This will trigger the Zap whenever your MapMyFitness account logs a new workout activity from the app on your phone.
Select Continue, and on the Test trigger page, select Test trigger to see if Zapier can make a connection to your MapMyFitness app and discover the latest workout.
Note: If it doesn’t, log a new workout on your MapMyFitness app and then rerun the test. It should discover the new workout and will display that data as shown below.
Now you’re done setting up the MapMyFitness workout log trigger. It’s time to set up the connection to Google Sheets to log those workouts. Select Continue to move on.
Set Up the Google Sheets Action
On step 2, under Choose app & event, select the Google Sheets app. Then select your connected Google Sheets account. If you don’t have one authorized yet, just select Connect a new account. Just go through the same authorization process as you did for MapMyFitness above. Once authorized, select your connected Google Sheets account.
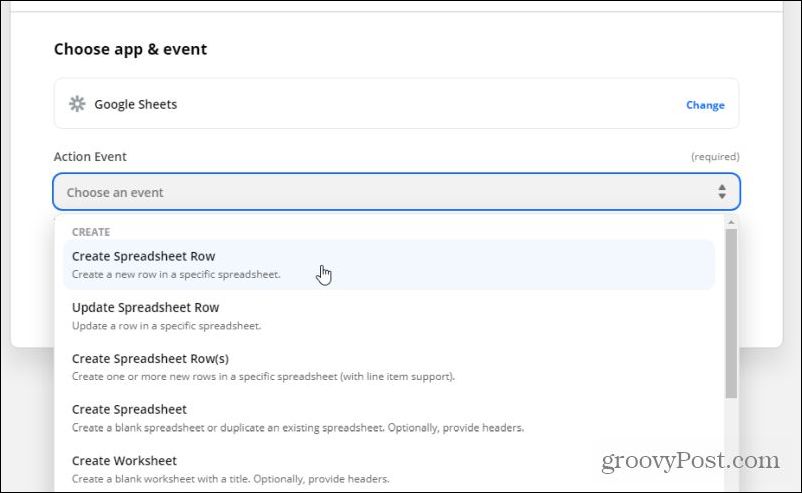
Select Continue to move on to the next step. Under Action Event, select Create Spreadsheet Row. This trigger will add a new row to an existing Google Sheets spreadsheet whenever the trigger (a new MapMyFitness workout) gets triggered.
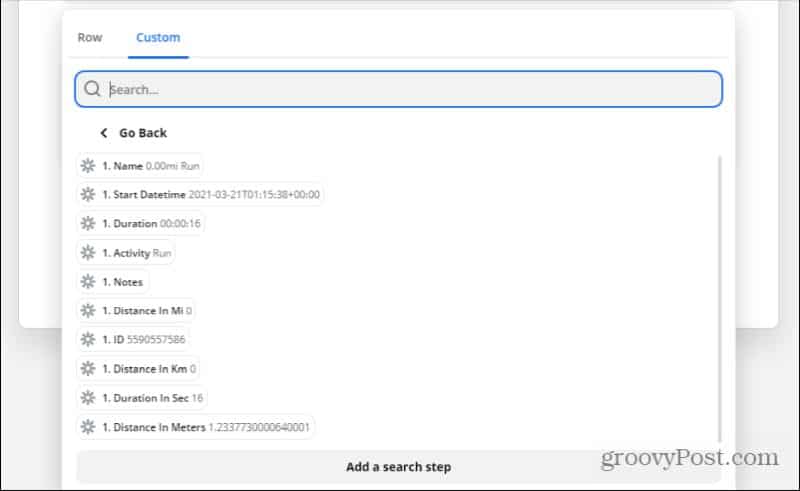
Under the Spreadsheet section, choose the Custom tab. This will show you all of the data that comes from the MapMyFitness trigger. This is the data you can load into your spreadsheet in Google Sheets.
Since you don’t have a Google Sheets spreadsheet set up yet, now’s the time to create it and set it up to receive this data.
Create the Google Sheets Spreadsheet
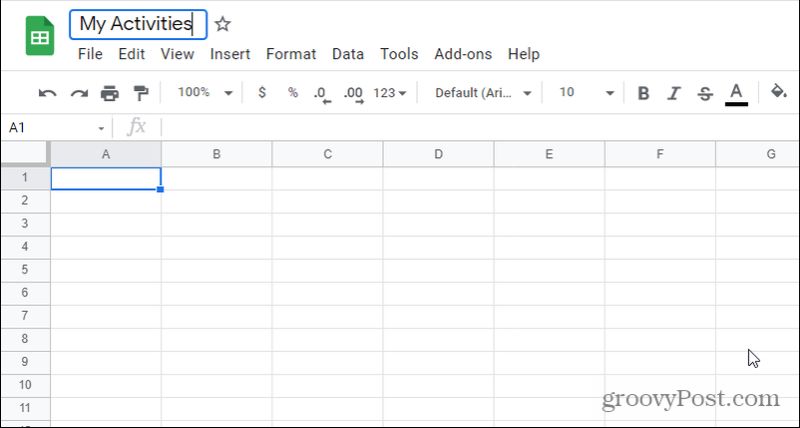
Log into your Google Drive account and create the exercise log spreadsheet wherever you’d like it to go.
Give the spreadsheet a name and make note of it so you’ll remember it in Zapier.
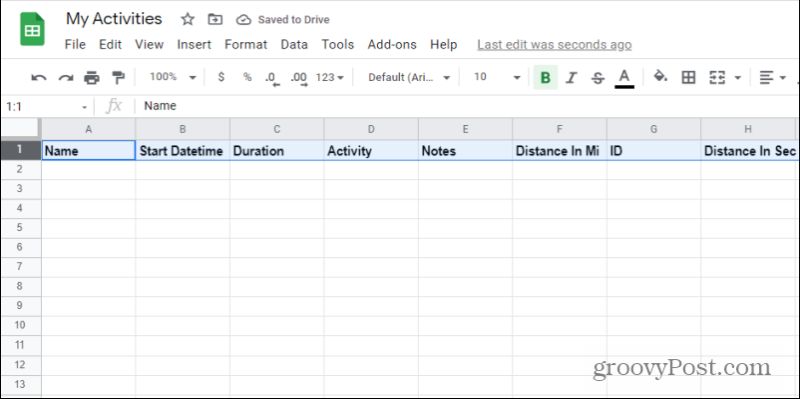
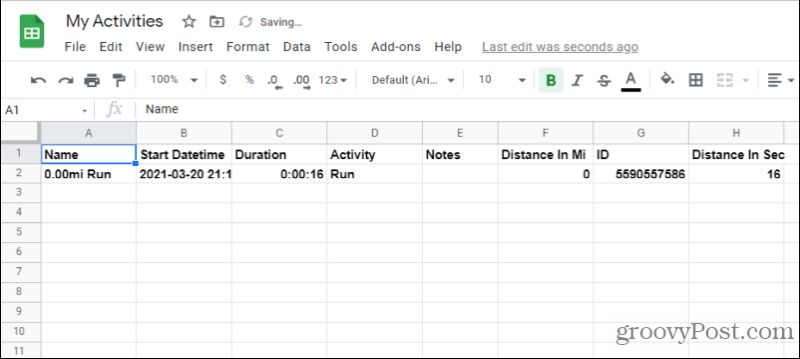
Finally, give the fields in the first row a name that matches the data you want to place there.
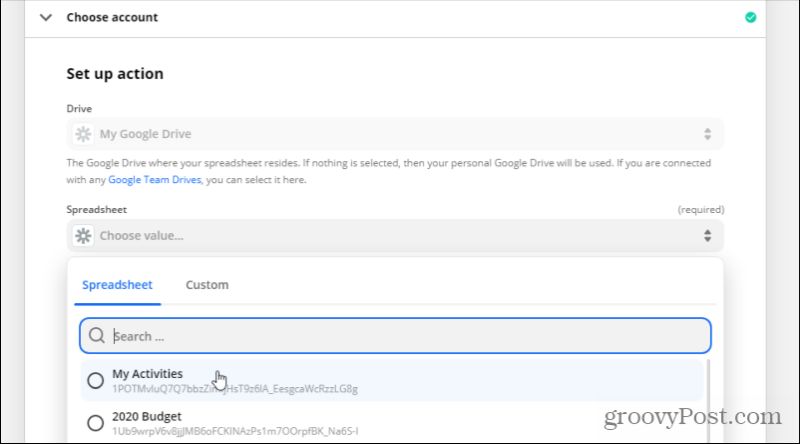
Now that you’re done creating the spreadsheet, go back to Zapier and select the Spreadsheet tab. Select the new spreadsheet you just created in Google Drive.
If Zapier can’t find the spreadsheet and fields, select Refresh fields at the bottom, and Zapier will reconnect to your Google Drive account and retrieve available spreadsheets.
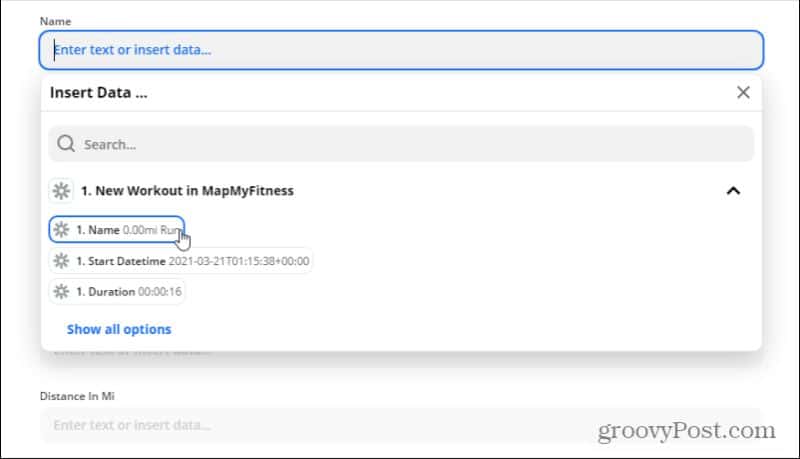
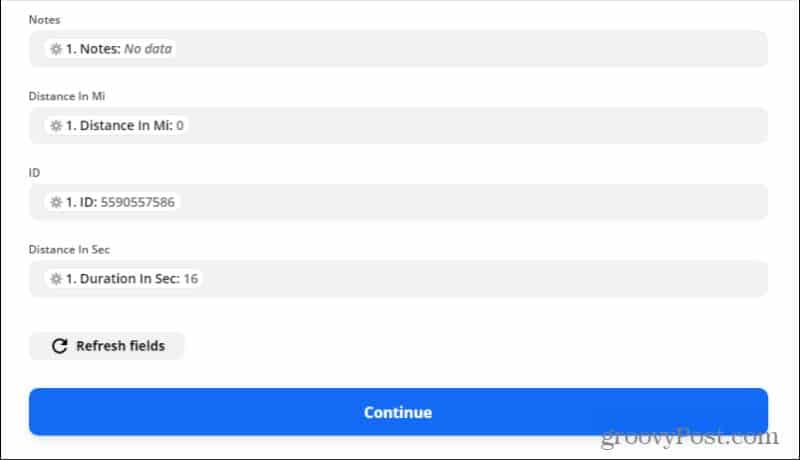
Select Continue. In the next step, you’ll see all of the fields in your spreadsheet. For each Insert Data field, select the MapMyFitness data item that you want to load into that spreadsheet field.
Once you’re done assigning all of them, select Continue to move to the next step.
Test and Finish the Zap
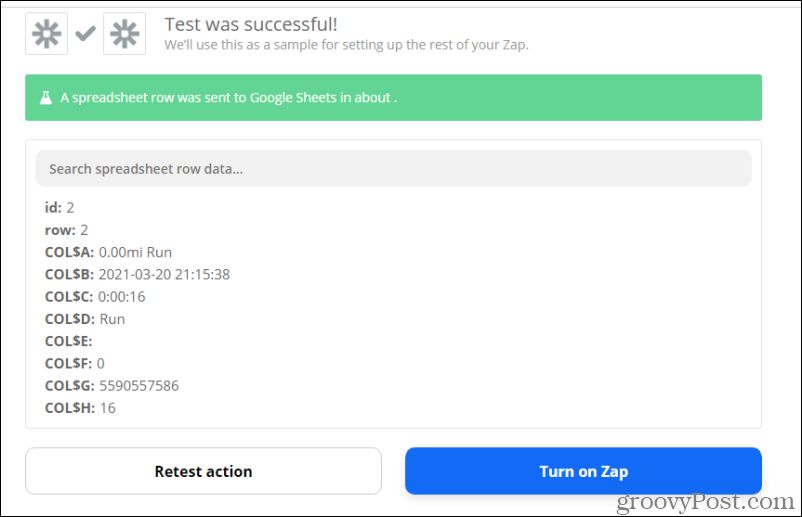
Finally, select one of the Test buttons on the next screen to have Zapier attempt to write a row of data to your new spreadsheet. If the test is successful, you’ll see a success message at the top of that step section.
Go look at your Google Sheets spreadsheet. You should see the last MapMyFitness workout data loaded into the first row of the spreadsheet.
If everything looks good, just select Turn on Zap and you’re done! Now, any time you log any kind of workout in your MapMyFitness app, you’ll have that data logged automatically into your new Google Sheets spreadsheet. Never worry about losing information about any of your past workouts again!
![]()


