Scan and Remove Malicious Code Using Windows Defender in Windows 10
When you launch Windows Defender for the first time, you are greeted by a dialog telling you about the new improvements, click Turn on then Close to dismiss it.
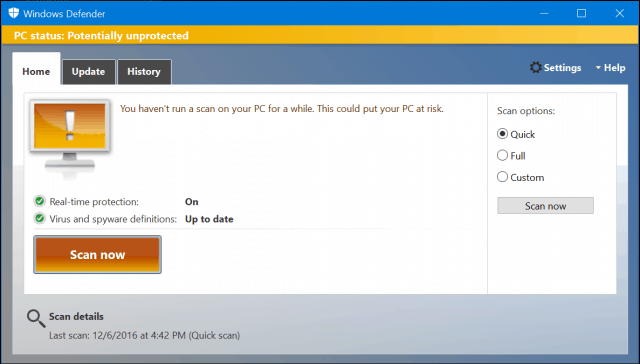
Not much has changed interface wise in the utility. Depending on the status of your computer, Windows Defender will display a particular color. If the status bar is green, then you are currently protected.
If it’s been a while since you last updated Windows Defender, the status will indicate your PC is not protected, represented by an orange color. You can resolve this by clicking the Update Definitions.
Red indicates a threat has been detected.
Windows 10 Improvements and Integration
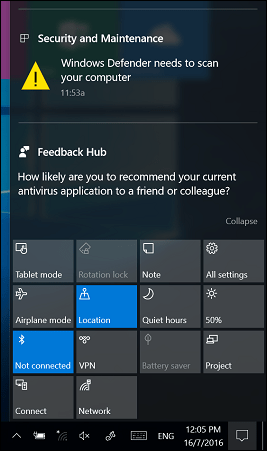
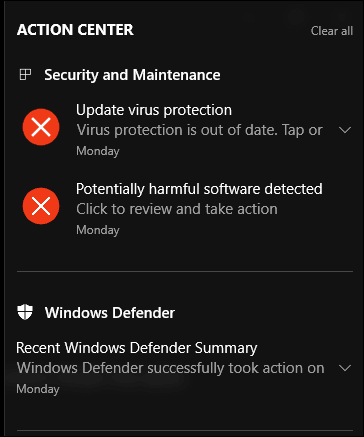
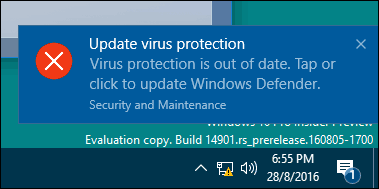
Defender provides better integration throughout the operating system. Examples of this can be seen in areas such as the Windows Action Center. Windows Defender will notify you when your definitions are out of date, which providing the option to update immediately.
The Notification Area icon and right-click context menu have also been restored, providing quick access for scanning drives, folders, and applications.
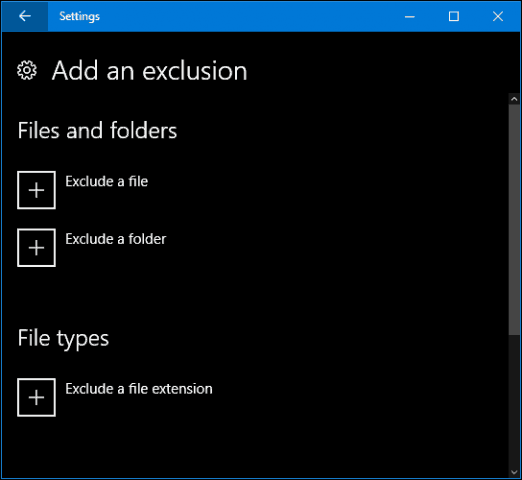
A new modern settings interface makes it easy to modify and adjust Windows Defender functions; such as Realtime Protection and Cloud-based Protection. If you need to add an exclusion, you can do so from within the new settings interface. This is important, especially when editing system files such as the host file.
Updating Definitions
Even if your status is protected, you should still check for updated definitions. Definitions are available through Windows Updates or within the Windows Defender interface; select the Update tab then click Update definitions. You can also review additional information about your definition status, such as the last time definitions were created, updated, and versions installed.
If you need to obtain definitions for an offline computer; you can download them from the malware protection center, save it to a thumb drive, then initiate installation on the target computer.
Scanning and Removing Threats
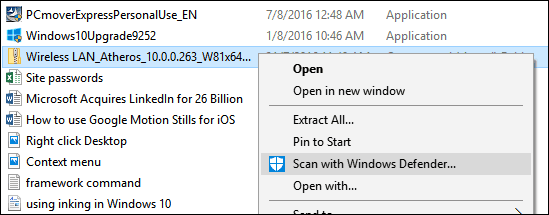
You can start a scan in multiple ways. For external storage devices, open File Explorer > This PC, connect your device, right-click the device then click Scan with Windows Defender.
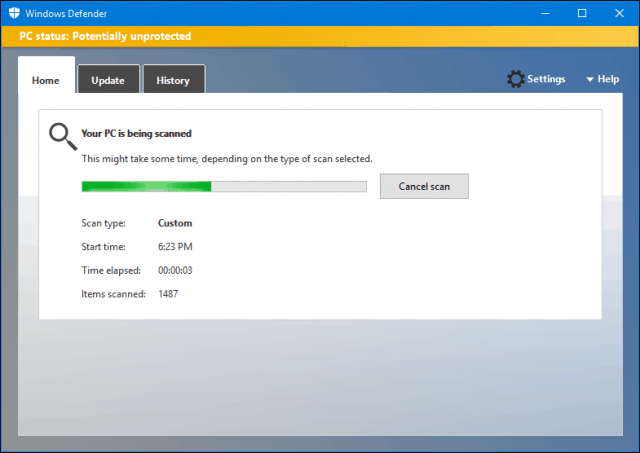
You can start a scan from within Windows Defender itself. The utility offers three options: Quick, Full, and Custom. Quick – checks the areas that malicious software including viruses, spyware, and unwanted software are most likely to infect. Full – scans all files on your computer and running programs. A full scan takes more time depending on the amount of files stored on the computer. Custom – This option lets you scan only the areas of the system you choose. When you are ready to perform a scan, select the option that best suits you, then click Scan now.
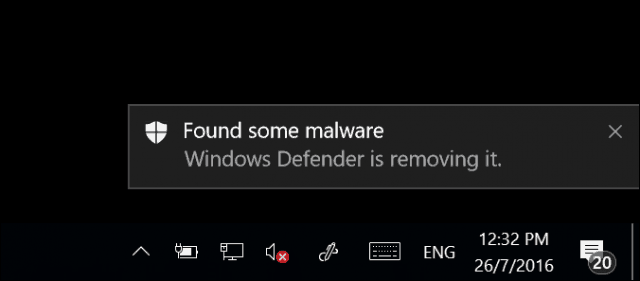
When a threat is detected, Windows Defender will notify you of its existence. Attempts will be made to remove the threat automatically.
To learn more about a detected threat, launch the Defender program, then select the History tab. Click View details to review the type of threat, along with its severity and a description of its behavior. If it is determined Windows Defender detected a false positive, you can modify the behavior and restore the item. Do this with caution, though.
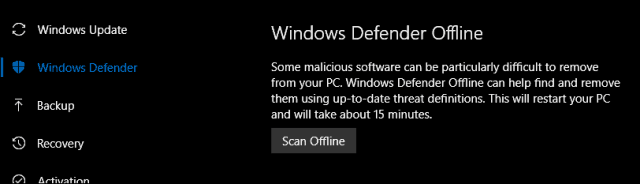
You can also perform offline security scans for hard to remove threats. Previously, this function required downloading the Windows Defender Offline Tool; check out our previous article for instructions on how to use it.
Microsoft has also made improvements to how Windows Defender behaves with third-party antivirus utilities. Although it was initially designed as a fallback option when third-party antivirus utility subscriptions expired or customers refused to renew a subscription; Microsoft has engineered Defender so that both can co-exist. So that’s a look at the new Windows Defender and how to use it. Are you a fan of Windows Defender or do you prefer using a third-party antivirus utility? If so, tell us why in the comments. Comment Name * Email *
Δ Save my name and email and send me emails as new comments are made to this post.


![]()


![]()
