Let’s take a quick look at some of what Windows Live Sync is offering:
Unlimited syncing between computers – That’s right—unlike Dropbox, which gives you just 2 gigabytes of free storage with syncing capability, Windows Live Sync lets you sync as much as you want between computers. That means you could feasibly backup the entire contents of a machine to another one. Documents, photos, media files, and other files in synced folders are available for viewing and editing even when one or both machines are offline. Caveat: although you get 25 GB of storage with Skydrive, only 2 GB are currently available to be used with Sync to the cloud.Remote Connections from PC-to-PC – VNC is nothing new, but it hasn’t been presented to casual users in as user-friendly a fashion as Live Sync offers. Now, logging into your home PC from work to grab that critical file is easy enough to make it SOP. You can even do it from the Web (as long as the machine is running IE 6 or higher.)Sync Program Settings Between Computers – Sync lets you synchronize your Internet Explorer favorites and Microsoft Office settings (i.e. email signatures, styles, templates) between all of your PCs.Syncing Between OS X and Windows – Microsoft has also developed a Live Sync app for OS X, meaning you can even backup and sync your data between Macs and PCs.
At first blush, the beauty of Windows Live Sync Beta is that it’s a sort of “greatest hits” of cloud computing and remote file sharing, all contained within a familiar, user-friendly package. Even better, it all integrates seamlessly with other Live apps and Web apps (Microsoft Office Live, in particular.) Does Windows Live Sync Beta do anything that I can’t already do with TightVNC, Dropbox, Xmarks, and Google Docs or Crashplan? No. But isn’t it better to do many things with one piece of software than attempt to force all these other programs to play nicely together? I think so. Anyway, check out the tutorial below on how to get everything that Windows Live Sync Beta does well (and there’s a lot) and then decide for yourself. You might want to grab a cup of coffee for this one!
Getting Started
These groovy new features are only available in the Beta version of Windows Live Sync, which comes bundled with the Windows Live Essentials beta pack (not to be confused with the current version.) You can grab it over at the Windows Live Essentials beta download page. While you’re waiting for that to download and install (it could take awhile,) hop on over to Live.com and sign up for a free Windows Live account, if you haven’t already. All the best Windows Live Essentials apps incorporate your Windows Live account—including Sync. (Note: Windows Live Sync works for Windows Vista Service Pack 2, Windows 7, Windows Server 2008 Service Pack 2, and Windows Server 2008 R2. Sorry XP users.) After you have Windows Live Essentials with Sync installed, go ahead and run it from the Start Menu to get started. It’ll be under Windows Live Accessories. You’ll be asked to enter your Windows Live credentials. Do so and Click Sign In. This sign-in will bring you to the Status window for Sync.
For now, there’s not much to look at. So, let’s go ahead and sync a folder.
Sync Folders with Live Sync
Before we begin syncing folders with Live Sync, make sure that you have the Live Sync Beta installed on all of your machines. I’ve gone ahead and installed Live Sync on my EEE PC while you weren’t looking—you’ll see it pop up in following screenshots. Now, let’s begin.
Step 1
Click Sync a folder from the Status window. Browse to a folder you’d like to sync and Click Sync.
Step 2
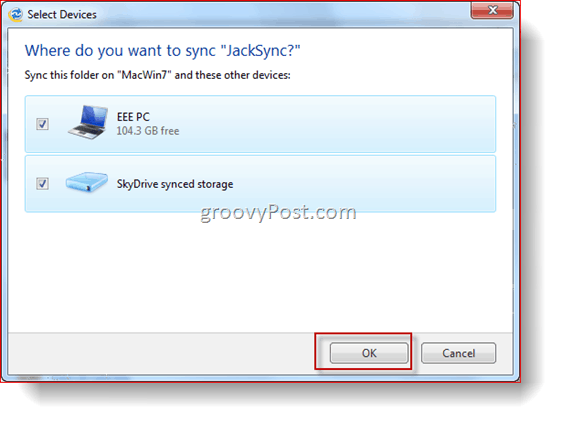
Check the boxes next to the devices you’d like to sync the folder with and Click OK. I’ve selected both my EEE PC and my Skydrive. This way, I’ll be able to access my synced folder from the web as well as the desktop on my EEE PC.
Step 3
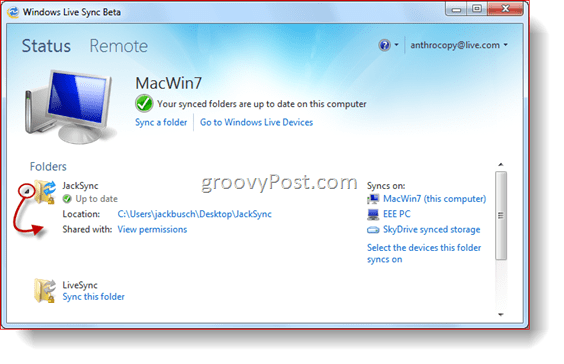
Now, back at the Status screen, you’ll see the folder we just synced. Click the arrow to see more details and options.
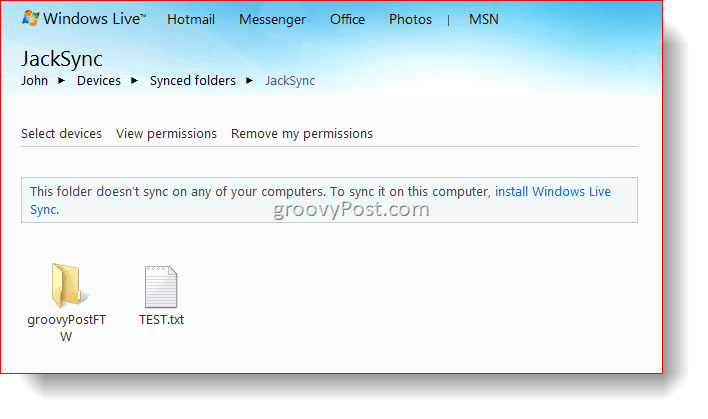
And that’s it. You should be able to access the contents of that folder from each of the devices listed on the left under Syncs on:. To test it out, I’ve placed a file and a folder in JackSync, my synced folder. Now, let’s pull it up on our Skydrive.
Accessing Your Synced Folder from Your Skydrive
Step 1
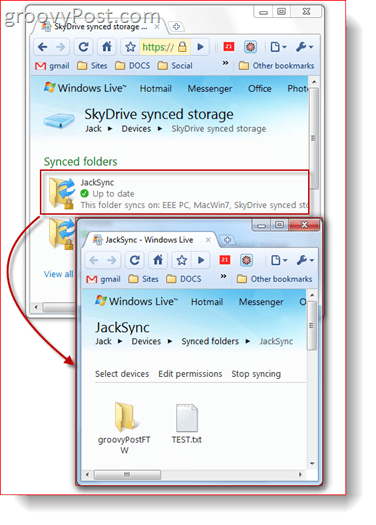
Navigate your browser to your Skydrive. From there, you’ll see a link for Synced Folders. Click it. This view will show you all of your synced folders.
Step 2
Click on a synced folder to show its contents.
Step 3
From here, you can Click a file to open or download it, just like any other item on your Skydrive.
Sharing Public Folders
Windows Live Sync also allows you to make folders and files public to up to nine people, as long as the folder is also synced to your Skydrive. Here’s how:
Step 1
Click View permissions next to “Shared with:” under the folder you’d like to share from the Windows Live Sync Beta status window.
Step 2
Type the email addresses of the people you’d like to share the folder with. You can allow contacts to change permissions from the drop-down menu to the right of their name. You can stop sharing a contact by un-checking the box next to their name. When you’re done, Click Save.
Step 3
The person you shared the folder with will receive an email invitation. Ask them to Click View Invitation. Note: the email will come from something like sync-1245124@windowslivemail.com, just in case it winds up in the Spam folder.
Step 4
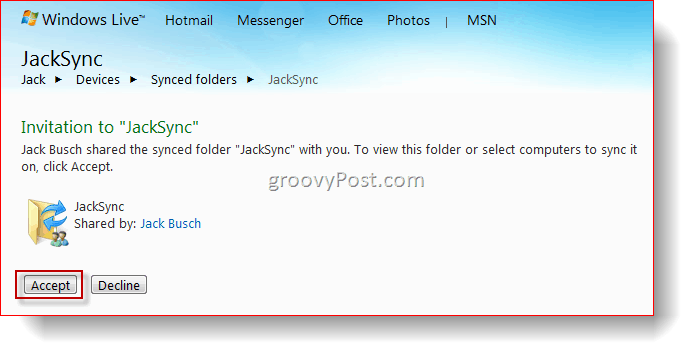
After they log in with their Windows Live ID, they can view and accept the invitation by Clicking Accept.
Step 5
They can now view, edit and download the file as if it were their own. Meanwhile, if you add files to the synced folder on your desktop, it automatically becomes available here.
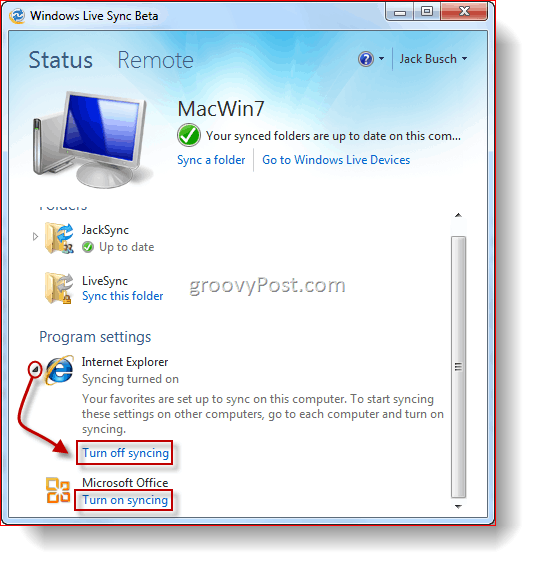
Syncing Program Settings
Windows Live Sync Beta allows you to synchronize your favorites (bookmarks) on Internet Explorer and your email signatures, styles, and templates on Microsoft Office. Activating this feature is simple: just Click Turn on syncing below the program from the Status window. To stop syncing, Click the arrow to expand and Click Turn off synching. You must do this on each computer that you’d like your program settings synced across.
Syncing Between a Mac and a PC
Windows Live Sync Beta is also available for the Mac systems running OS X 10.5 or newer. You can grab the Windows Live Sync Beta for Mac .dmg here. Once you get it, you know what to do—Drag it to the Applications folder just like any other application to install.
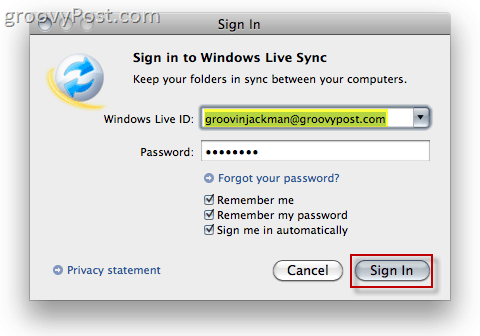
Step 1
Run Windows Live Sync for the first time and Type in your Windows Live ID credentials.
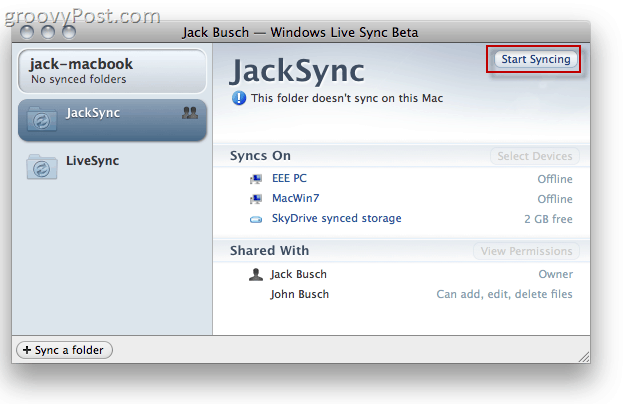
Step 2
Click on a previously synced folder on the left to begin syncing on your Mac.
Step 3
Click Start Syncing to begin syncing the selected folder.
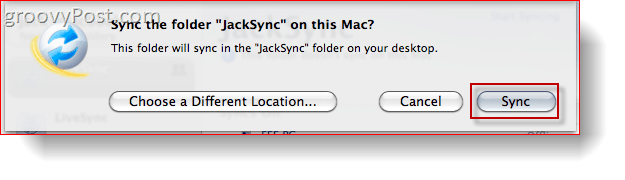
Step 4
Click Sync to save the folder to the default location (the Desktop.) Or, if you’d rather place it elsewhere, you can Click Choose a Different Location.
Step 5
Access your synced folder via your Macbook. Now, any files added to this folder from your synced devices will be reflected across all machines.
Step 6
Click Sync a folder to choose an existing folder on your Mac to sync with your other devices.
Step 7
Browse to select a folder you’d like to sync. Afterward, Choose which devices you’d like to sync with and Click OK.
Step 8
From your Windows machine, Open up the Windows Live Sync Beta Status window and Click Sync this folder and choose a location for the synced folder.
Step 9
Access your synced Macintosh folder from your Windows machine.
Remote Connecting with PCs
As a bonus, Sync also allows you to remotely control another Windows machine by running Sync remotely. Unlike other VNC programs, Sync doesn’t require you to mess around with stuff like IP addresses, ports, and all that jazz AND, it’s not full of security exploits
Step 1
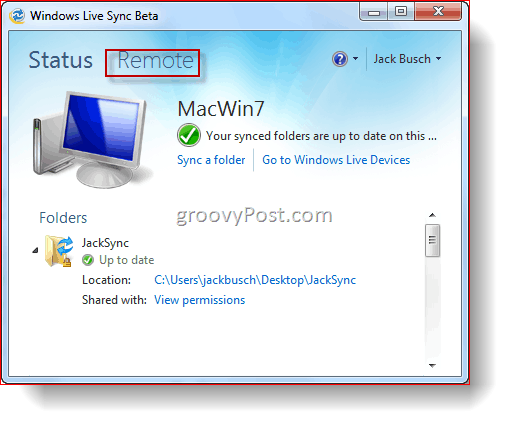
Click the Remote tab from Windows Live Sync Beta.
Step 2
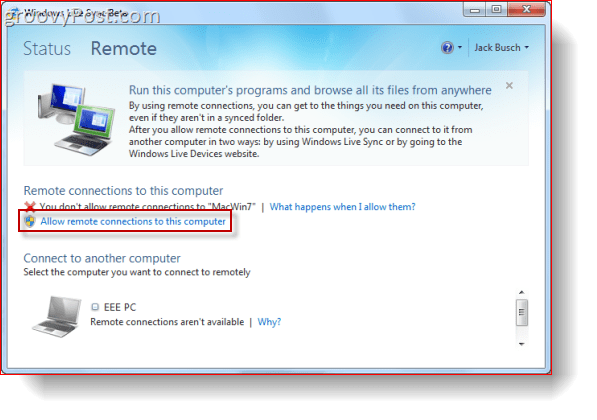
Click Allow Remote Connections to this computer. Do this for both the machine that will be controlling the remote machine and the remote machine itself.
Step 3
Click Connect to this computer underneath the machine you’d like to control.
Step 4
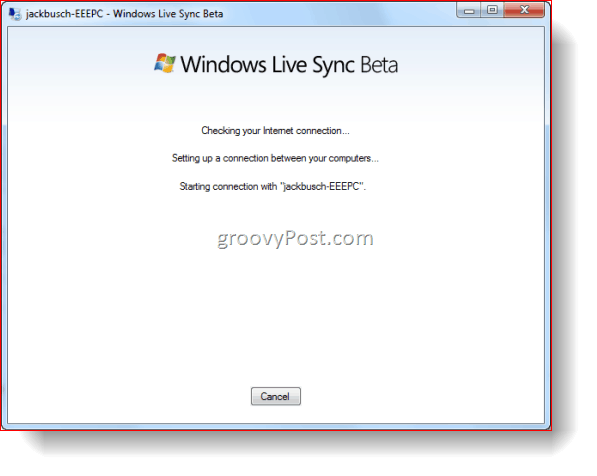
Wait for the remote connection to be made. This process could take a minute.
Step 5
From the remote-controlled host machine, Click Allow when notified that a user is attempting to connect.
Step 6
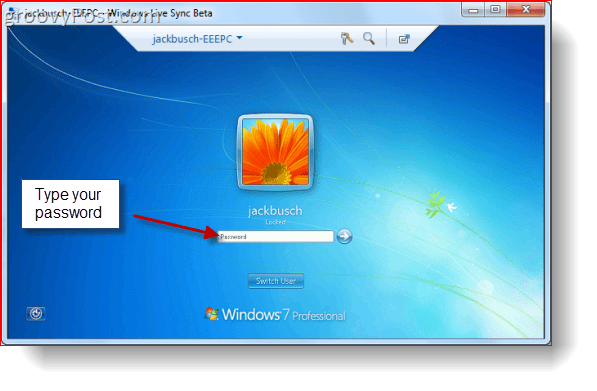
From the client machine, log in to the computer with your Windows username and password for the host machine.
Step 7
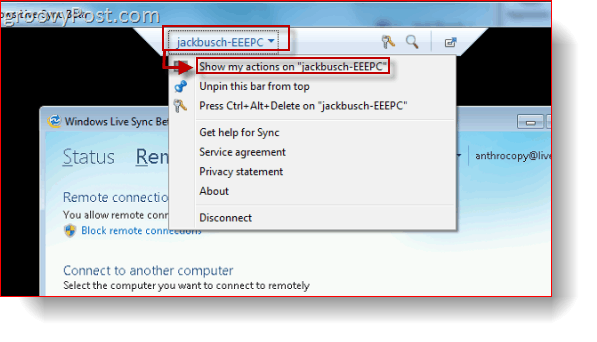
Click the Name of the computer from the top toolbar and Click Show my actions to allow the host computer to see what you are doing. By default, the remote controlled computer’s screen will be blanked out; showing your actions reveals the screen.
Now, you’ll be able to control the machine remotely, just as if you were sitting in front of it. Meanwhile, on the host machine, a semi-transparent notification announces that the machine is under remote control. You can move this around by dragging and dropping it.
Step 8
Click Disconnect from the menu bar when you’re finished.
What really makes the remote connect feature shine is the ability to connect to a PC from the web too. You can do so by logging into Windows Live Devices at devices.live.com from Internet Explorer and Clicking Connect to this computer. Then, follow the above steps as usual – wow!
As of now, you can’t control a Mac from a Windows machine or vice versa since Remote Connect requires IE6 or later (IE for Mac stopped at 5.) But maybe in the future?
Conclusion
Windows Live Sync Beta has a ton of groovy features, each with a plethora of potential applications I just can’t wait to explore. The unlimited syncing capability to another computer is perhaps one of the grooviest features yet which I’ve missed since Microsoft pulled the plug on Foldershare. As we speak, I’m syncing my entire iTunes library between my two computers for both backup reasons AND usability. In the past, this was already possible with a little bit of fiddling and tweaking, but with Sync, it’s a snap. Best yet, any subsequent music or video files I add to my main machine will instantly be kicked to my netbook. The hardest thing is the initial wait for my 40 GBs of media to transfer over the Internet, but the very fact that I’m doing it is amazingly convenient. I’m already thinking it might be a good idea to setup a sync with my computer at work also, so I have an offsite copy as well! And that, I think, is the best part of Windows Live Sync Beta so far. It takes things that were previously out of the reach of all but intermediate to advanced groovyReaders and makes it as simple to use as MSN Messenger. From Remote Connect to cloud storage and syncing and backup, Windows Live Sync is incredibly easy across the board, FINALLY. For now, I encourage you to download it, set it up, try it out for a few days, and compare it to the various other programs that you’ve probably been using to perform these functions. That’s what I’ll be doing for the next week or so—check back later to catch the verdict. AWESOME service and I’m glad to see it has been worked into the Live Sync client. Comment Name * Email *
Δ Save my name and email and send me emails as new comments are made to this post.


![]()
